Showing posts with label Rigging. Show all posts

Sunday, August 15, 2021

Zenko Rig Reel

Zenko Rig Reel

Zenko was my capstone character that I rigged and animated for Zenko: A Fox's Tale.  He is built to have a very reactive spine that is easy to stretch and squash.  Unlike many rigs, Zenko is build with FK Space controllers in all four legs rather than regular FK controllers.  This kind of controller is great for characters that are in the air and creatures that fly.  I also build four visible pivots that the animator can use to show how the feet can lean.   Zenko also has two master controllers, visibility controllers, curvature controller in his neck, and a controller that controls which space the eyes are in.  Overall, Zenko was a very fun character to rig as he is the first character I have rigged for games.  Some of the considerations that went into Zenko's rig was the fact that his spine was not supposed to move like a regular fox.  His spine is inspired by snakes, ferrets, and cats.  We also wanted a lot of movement in his tail so there are a lot of controllers built to give fluid movement.  We also wanted a lot of expression in Zenko's ears as he does not have a facial rig.  Besides creating Zenko's rig, I also created Zenko's animations.  For his animations I looked at many fox videos and I captured over 60 clips of my dog Rivers doing many of the movements we were looking for Zenko to do.  I also created his original Character Sheet that broke down who he is as a character.  The beginning of this reel is clips from the Zenko release trailer and afterwards it shows off his rig.  The music is from Zenko: A Fox's Tale release trailer. 

Saturday, August 14, 2021

Lucy Rig Reel

Lucy Rig Reel

Lucy was a rig I did in my undergrad before FIEA.  Unlike the rigs I created in FIEA, she is built for film.  She appears as the secondary and hero character in the University of Central Florida's Character Animation short animated film, Delivery.  Overall, she has been the most difficult rig I've had to work on.  Some parts of Lucy were rigid, while others were flexible, and in some places she was both rigid and flexible.  What made Lucy so difficult was the fact that I was learning how to rig while rigging her and she is the most complicated character in the character animation program's history.  It took me my entire senior year, and a lot of very late nights, to rig her and make her perfect.  Some of the parts on her that really tripped me up was her collar, front paws, the skeleton spine on top of her actual spine, and adding the back toes to her back feet.  Each of these problems needed a lot of research to have it rigged correctly, hours of troubleshooting and testing, or both.  Overall, Lucy is my favorite rig I have created.  Anytime I show Lucy, everyone loves her character.  Because I created the animation for her while at FIEA, I added it to the beginning of her rigging reel.  The music is called Summer Time by MorningLightMusic.

Thursday, August 12, 2021

Lucy Walk Cycle Reel

Lucy Walk Cycle Reel

This is an animation I've worked on for a period of time.  Lucy was a character I rigged and animated in undergrad and has continued to be a character I'm constantly learning from.  With this animation I learned more about quadrupeds and how they move.  Quadrupeds are more difficult to animate then you might think.  My biggest learning experience with this animation was the idea of how her upperbody moves in correlation with how her lowerbody moves.  I also learned about adding fidgets to walk cycles and how they bring personality and life to characters.  I was very inspired by how my own dog Rivers moves and acts as both Lucy and Rivers have similar personalities.  Both of them also have similar physical characteristics such as big floppy ears.   One of the signature actions my dog does is to stick her tongue out and close her mouth with an excited and playful facial expression.  She does this when she's very excited to play with her toys.  With Lucy I wanted to have the same signature action but Lucy style with exaggerated movements in her ears and tongue.   I also learned more about facial animation as Lucy's face is a skull and in the moment she looks over, she needs to look happy and smile.  When Animating the head I actually never thought about the curves that the head motion makes.  The big indicator to visualize Lucy's curves was her nose.  I was constantly watching Lucy's nose to see what kind of curves her head motion was creating.  After understanding her head motion I worked on her ears and learned about how they drag behind and the floppy look they can give when being dragged.  Overall it was a super fun experience animating Lucy and learning more about characters that are just like her!  For animating Lucy I worked in Autodesk Maya 2020 and for rendering I used Pixar's Renderman!  The music is called Summer Time by MorningLightMusic. 

Tuesday, August 10, 2021

VR Simple Shotgun Rig Reel

VR Simple Shotgun Rig Reel

This is a very simple shotgun rig I created for the No Country for Old Men VR experience in the common art class.  This rig has fully FK functionality and is able to move all parts of the shotgun.  For this prop I actually did some research and watched how shotguns work and watched people take apart and put together the shotgun.  Some of the considerations were how the player is going to interact with it, reloading, pumping, shooting and holding the weapon.  I learned a lot from rigging this weapon and this was my first weapon rig.  The model is by Eric McGinnis and the music is called Glock by NewsStreetMelody

Monday, August 9, 2021

VR Simple Money Case Reel

VR Simple Money Case Reel

This is a very simple rig created while in my common art class for a VR experience of No Country for Old Men.  The rig functionality needed to allow the case to be closed, opened, move the case handle, and can move the buckles on the case.  It is fully FK functionality and in the 3D world the player is able to interact and pick up this object.  The model is made by Desiree Gerlach and the music is called Glock by NewsStreetMelody.

Sunday, August 8, 2021

Tarantula Proxy Rig Reel

Tarantula Proxy Rig Reel

This is a rig that is currently in proxy mode and that I want to in the future update with more complex controllers and skinning.  Because I've worked on quadrupeds, I decided to try a creature that has more than four legs, so I chose to rig a tarantula.  I find tarantulas to be very interesting creatures in the way they move and behave.  The big challenge with this rig was how the legs move and the way the body reacts to that movement.  With the body of the tarantula being very rigid, trying to determine how the legs move was a bit of a challenge because part of the legs are under the tarantulas body.  It's difficult to see how the underside of a tarantula moves unless they are flipped on their backs.  My biggest surprise when rigging a tarantula, was learning that they sometimes actually walk on 10 legs especially when they are very young.  Tarantulas have limbs called the pedipalp that they use to grab their prey and they will use those to help walk.  To describe how this rig works the body is forward kinematics and each of the legs is inverse kinematics with a knee and ankle bend controller.  I found this model on Sketchfab by JMuro1 and the music is called Tarantulas by Christian Nanzell.  

Thursday, July 22, 2021

No Country for Old Men Sprint #12

 This week I worked on lighting and fixing the bifold door rig.  Earlier in the week I had level designer Joey critique the lighting I did in the level.  I messed around with the lighting in the hallway and tried to create two lights on both ends of the hallway.  Joey suggested having it a cooler color than a warm color. 

Placing Lights on Both Ends of the Hallway

After playing around with this idea I ultimately took out those lights and placed one light in the hallway behind the mannequin standing in for Anton.  After working with the hallway I went into the bedroom and checked the light complexity and found very little red.  The hallway by the light was in the orange range.

Bedroom Light Complexity

Hallway Light

 Since the bedroom was too dark, I added a few lights to brighten up the room so that the player can see better.  I also adjusted the settings on a few of the lights to blend them into one another.  

Adding Lights to Room

After many builds and changing settings on the lights I had my team test the lighting in the headset and I set images to three level designers for critique.  My team was able to see the room a lot better with the new lighting and I got positive feedback from the level designers. The biggest part of lighting that needs to be fixed is that there is no black and that the player should be able to see everything.  

New Lighting in Scene Angle #1

New Lighting in Scene Angle #2

Level Designer Brian Critique

Level Designer Teandre Critique

Level Designer Joey Critique #1

Level Designer Joey Critique #2

After having the professors also critique the lighting in the scene I took out the Sphere Reflection Capture and kept the Box reflection capture in the scene.  The lighting by the dresser was illuminating it too much so I also dimmed the ambient light in that area to still help the player see in that area but also have the dresser not look like it's glowing.  After messing with some of the settings we had an interesting issue with the shadows that appeared behind the fan on the dresser and an unknown shadow that appeared on the wall.  

Shadow Problem by Dresser

To combat this problem I changed the light mobility to stationary and dimmed the light down which made the odd shadows disappear.  I also turned off casts shadows. 

Shadow by Dresser Problem Solved

After working on lighting,  I got an update for the geometry used for the bi-fold doors.  I jumped into the rigging file after downloading the new geometry and imported it in.   I unbound the original geometry and deleted it out of the scene and then cleaned out the name space editor.

Old Bi-Fold Door Rig


Unclean Name Space Editor

After cleaning the name space editor I noticed that the door nobs were not in the same place as before so I hopped into the rig and disconnected a few constraints so I could move the door knobs back in place. I then constrained what I had unconstrained and checked to make sure the rig was still working as expected.  

Door Knob Fix

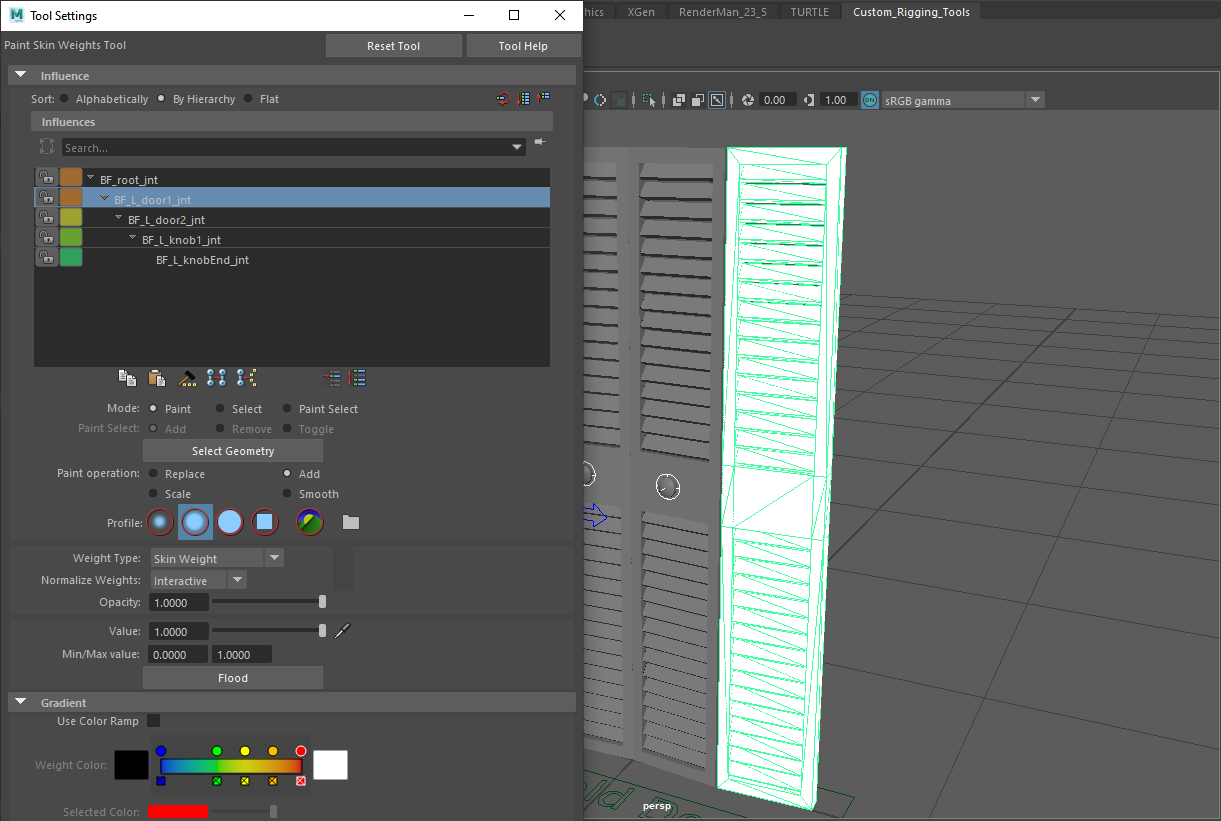
I then re-skinned the geometry back onto the rig which was flooding specific geometry to specific joints since this rig is very rigid.  

Flooding Skin Weights to Door

From here I updated this rig in engine and let my team know to check it in the VR head set for any unexpected issues.  

New Door in Engine


Friday, July 9, 2021

No Country for Old Men Sprint #11

 For this sprint I worked on adding the fixed money case rig to the engine and I worked on lighting.  I began to also get low drive space messages from my computer so I bought and SSD to help create space. 


Low Space Message from UE4

As I was working on the Money Case rig I found that the problem was because the geometry was in groups.  I froze transformation and deleted history and took all of the geometry out of the groups.  I then re-skinned my geometry to my joints and double checked that everything was cleaned.

Re-Skinning the Money Case

I then exported the rig and brought it into the engine with success!  

Money Case Rig in Engine

After I learned a little bit about optimization from my lighting assignment I decided to check out the scene and see what the optimization looks like.  I fixed some of the optimization on the geometry. 

Optimized Scene 

I also adjusted the fan light in our scene.  I moved it more on top of the light and I made the outter and inner cones bigger.  I also increased the intensity to help in areas that were a little too dark.

Adjusted Fan Light


Aside from adjusting the fan light I also added two ambient lights.  I turned off casts shadows and added them by the bed and the dresser.  One of the lessons I learned from the level designers is that ambient lights should have casts shadows turned off.  

Two Added Ambient Lights

In the past posts the hallway lights bleeding through the walls was an issue so I took out the extra lights and just have one light that is by Anton.

Fixed Hallway Lights

Another important lesson I learned from just being around the level designers was that you want your light importance map to be very close to where you want it to render.  So I adjusted the size of my light importance map and my post processing. 

Adjusted Post Processing and Light Importance Map

At this point I actually sent images to the level designers to get some feedback on where I could improve the lighting.  

Screen Shot #1

Screen Shot #2

Screen Shot #3

From two level designers I got critique.  Level Designer Joey thought I could improve the hallway light and the window light.  Teandre thought I could improve the lamp on the nightstand.  

Level Designer Joey Critique

Level Designer Teandre Critique

I actually jumped into a call with Teandre and he showed me how to work with lights that are in blueprints.  The lamp blueprint was not created by me and it had two lights in it.  To remove it we found a setting in the details and I was able to adjust one light in the lamp and remove the other light that was too high. 

Double Light Fix

Friday, June 25, 2021

No Country for Old Men Sprint #10

 For this sprint I worked on just the money case rig.   The money case rig is built to be simple and rigid.  It is fully FK functionality. 


Completed Money Case Rig

To start I simply placed my joints in the geometry in the areas that need to bend and move. 

Money Case Joint Placement

I also organized my hierarchy with a naming convention.  

Hierarchy Naming Convention

From here I used my controller generator tool and created some controllers for my rig.  I also colored and shaped the controllers around my geometry.  I also added constraints from my controllers to the joints for simple functionality. 

Using Controller Generator Tool to Create Controllers

Then I worked with skinning.  I added a geodesic voxel bind method and began to see how the rig moves and what needed to be adjusted.  After skinning I ultimately added some more joints and a few more controllers to get the movement I was looking for.  

Skinning the Money Case 

Once I skinned the geometry to the joints I went through each controller and locked and hid the transforms and scale.  

Money Case Lock and Hide

After cleaning the money case rig I exported and brought it into UE4.  I ran into an unexpected problem after bringing this asset into UE4.  Some joints were added and the root joint was taken out of the rig. 

Unexpected Broken Money Case Rig in UE4

To troubleshoot the problem I went back into Maya to search for the problem.  After opening Maya to my money case file it crashed and corrupted my rigging scene.  I did get my scene to open but I found a broken rig with all of the controllers locked.   To get the controllers to work I had to unlock all controllers.  

GIf of Broken Money Case Rig

I decided it was best to start with a clean file so I went back into a previous save I had worked on and went through and began to check for what could have caused the error in unreal engine.  I checked the geometry and cleaned it out of any values it had in the transforms and scale.   I found that a few of the pieces still had values and history.  I then checked each joint and re-skinned the geometry. 

Completed Money Case Rig

Thursday, June 17, 2021

Controller Genrator Tool Reel


Controller Generator Tool Reel

This was a project that really challenged me.  I learned a lot about coding in maya and how controllers for rigging is created.  I created this tool to help riggers speed up their process with pre-made controllers that are generated using this tool.  The UI is designed to have two tabs, one for creating the controllers and one for editing the controllers.  The controller creation tab is organized by the type of shape you need your controller to be while the editing tab focuses on changing the color of the controller, changing the rotation order, deleting history, and freezing transformations. Besides from creating the tool itself, I learned about how maya reads user set-up codes and is able to create both menus and shelves that don't disappear when the maya preferences are reset.  This has made me realize the way that maya works with it's folder structure and how powerful working with user set-up codes are for keeping your scripts running in maya.  

Friday, May 28, 2021

No Country for old Men Sprint #8

 For this sprint I worked on creating animations for our bi-fold door, continuing to work on the phone cord blueprint, and talking to level designers about lighting in unreal engine.  I will also talk about my hero assets and the assets I have been responsible for.  

For the door I used my bi-fold door rig and animated it to some reference I found on YouTube.  I created two animations for the door, one for opening and one for closing.

Gif of Bi-Fold Door Closing with Reference

Gif of Bi-Fold Door Opening with Reference

Once I cleaned up the curves, I had our project lead and out technical director check it to make sure it was at a fast enough speed and adjusted the animation to fit the speed we were looking for.  

Gif of Bi-Fold Closing

Gif of Bi-Fold Opening

Once the animation was completed I created a folder in our unreal project for the bi-fold door animations and added it them.  The next steps for this asset is to adjust it based on what 

Gif of Bi-Fold Door Closing in Unreal Engine

So far I have not had success with the phone cord.  I have been able to successfully make it in the world(not as a blueprint).  To solve this problem I talked to Chris and I also asked about making physics constraints in blueprints on tech-artists.org.  Unfortunately it did not save when I worked with Chris on this asset.  However when I did tackle this problem on my own beforehand, I got this result.  

Gif of Broken Phone Blueprint.

In the blueprint I worked with trying to replicate what I had created in the world and I found that some of the settings are unavailable.  Settings that I used in the world to connect the constraints are what make it possible to constrain properly while in the world.  So I'm continuing research and asking questions to get this asset working.

Phone Cord Blueprint Showing one of the Physics Constraint

I took on lighting for this project.  To really understand how to approach lighting I spoke to two level designers, Teandre and Brian and they gave me tips, a power point, and some videos to look at.  Some of the tips they gave me was to understand the different lighting models (static, movable, and stationary). They also told me about fake lighting with using a skylight, color schemes, and attenuation radii.  

Videos and Power Points from Teandre

Tips from Brian

My hero assets include:  The shot gun rig, phone cord blueprint, money case rig and lighting.

Shotgun rig is completed however this asset can have more rigging done to it based on how our technical director would like to proceed.  At the moment, the shotgun can move all of it's parts and has animator friendly locators to constrain to, however the shotgun bullets are not rigged.  The shotgun bullets are being worked on by our technical director.

Shotgun Rig with Textures

Phone Cord is currently being worked on and troubleshooted.  The phone cord by itself interacts with the ground as expected however in the past the cord would fly into space if the player interacted with it.  This has not been tested in the scene as a physics constrained asset.  Player interaction and collisions are going to be tested for this asset when it is ready to be put into our scene.  

Gif of Broken Phone Blueprint.

The Money Case Rig is currently still in modeling stage.  The game rez of the model is still being worked on but the considerations for this asset is that it has a basic rig, it needs to be able to open and close, and it needs to hold items such as money and the tracker.  This asset is also a physics asset.

I took on lighting for this project to learn a little bit more about lighting.  To start understanding lighting I talked to two level designers and I got some tips, videos, and power points to get me started.   

Assets I have been and will be responsible for are: shotgun rig, phone cord blueprint, bi-fold door rig and animations, lighting, and the money case rig.


Gif of the Bi-Fold Door Closing Animation in Unreal Engine

Our schedule is planned out for each individual on the team.  In a time span of certain dates each of us works on specific tasks or completes tasks.  

Image of Team Schedule(The schedule document is very long)


For assigning assets, the modelers have a document that shows where each of the assets are in their process of completion in the modeling stages.

Image of Assets Assigned to Modelers


Zenko Rig Reel

Zenko Rig Reel Zenko was my capstone character that I rigged and animated for Zenko: A Fox's Tale.  He is built to have a very reactive ...