Showing posts with label Research. Show all posts

Wednesday, July 21, 2021

Real Time Hair with Unreal Engine 4 and Blender

 To further my hair knowledge in the real time world,  I learned Blender and used Unreal Engine 4.  Blender is a very new program for me and I chose use blender because I have seen a lot of people using blender for various projects and bringing it into unreal engine. 

My Friend Abi's Hair in Unreal Engine

Gif of Red Hair, Inspired by my Friend Wilson, in Unreal Engine

To start the process, I created a 3rd person project in unreal engine.  I went up to edit and under plugins I enabled both Alembic Groom Importer and Groom and restarted the editor.  When you open the project it took some time to compile shaders.  This is allowing me to import strands from an alembic file and render the simulation.  

Alembic Groom Importer and Groom in Plugins

while the shaders were compiling I opened up Blender and imported my UE4 man into the scene.  I deleted everything in the scene before I imported.  I went into edit mode and selected on the head where I want the hair to appear.  

UE4 Man in Blender

Selection of Geometry on UE4 Man's Head

With the selection, I created a group and named it hair, this makes it easy for me to grab that same geometry again.  In blender I created the hair using a particle system and then switching the type to hair.  I ran into an issue where the hair generated all over UE4 man.  I forgot to tell where I wanted the hair to generate so it went everywhere. 

Creating Geometry Group in Blender

Hair Generated all over UE4 Man

To make the hair appear where I want it to, I went into the Density setting and set it to the hair group. I learned that UE4 man is a series of groups in blender so I could generate hair just on his hand or just on his foot. 

Hair Generated on UE4 Man's Head

After generating my hair, I began to get familiar with the tools in Blender to edit and create hair styles.  The first one I learned about was the Length setting.  This one controls how long your hair is and is usually the first setting you adjust to begin creating your hair style.

Gif of using the Length Setting

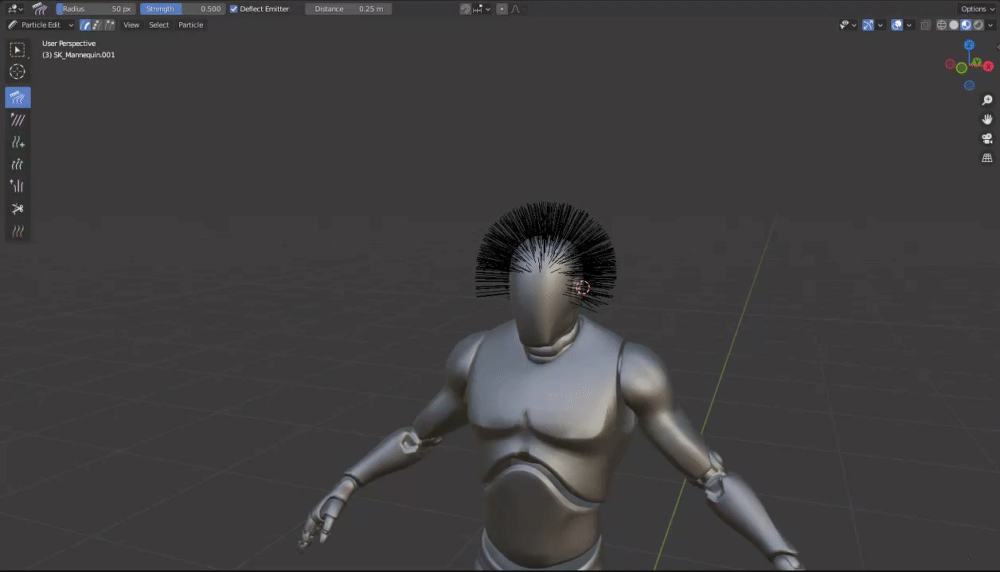
To begin styling your hair, you need to be in particle edit mode.  This brings up a series of tools that you can manipulate the hair with. 

Comb Tool - Quite literally brushes the hair 

Gif of the Comb Tool

Smooth Tool - Removes kinks for the hair

Gif of the Smooth Tool

Add Tool- Adds hair

Gif of Add Tool

Length Tool - Adds and Subtracts length to the hair


Gif of Length Tool

Puff Tool - Moves the strands away from each other


Gif Puff Tool


Cut Tool - Cuts the hair

Gif of Cut Tool

After getting familiar with the tools, I found some reference and got to work stylizing.  I went simple with my hair style, its harder than it looks to stylize the hair.  I tried to create the middle hair style in my reference.  From my experience with this first hair style, trying to even out hair in the shorter areas is what took most of my time.  

Hair Reference, I went with the Middle Hair Style

Hair Style in Blender

Once I got my hair style, I learned a little bit about interpolated strands. In blender you first need to be in object mode,  basically interpolated strands help with how the strands interact with one another.  It's a parent child relationship that physics is calculated from.  If you go intot he particle settings and select children you can make it interpolated.  When you mess with this setting it can get very tricky as you need to make sure the settings for display amount and render amount is the same.  Display amount is how much blender will show you and render amount is how much will export.  By default the render amount is 100 which is too big.  Blender looks at the render amount and will add 100 hairs for the hair you already see in the scene.  I put both of these settings at 20, keeping them the same will give you the result you are expecting.

Children Settings

To properly export the hair, I went under Particle settings, render, and I turned off show emmiter.  I unhid the skeleton in my scene and then selected both the mesh and then the skeleton and went up to file and export and selected alembic.  The recommended settings I found was to have the scale at 100, start frame at 1, end at 1 and have only selected objects and visible objects. 

Export Settings

To get the hair in unreal engine. I made a folder to keep the hair organized and imported it.   A specific groom icon appeared which meant the plugins were working.  I also found that in the groom settings before you import you need to make sure the rotationX is 90 degrees and the ScaleY is -1, unreal and blender disagree which way is up.  

Hair Icon

Groom Import Settings

Hair in Unreal Engine

To get the hair onto UE4 man, I selected his skeletal mesh and added a new components.  I then opened the third person character.  with the groom component selected, I went into the details and in the groom asset I selected the hair.  I found that the hair will appear but will float off the character.  This is a common problem so I learned about created binds.  I went back to the groom asset and right clicked on it.  I selected create binding and then a new window popped up.  I put in SK_Mannequin and pushed create.  

Floating Hair Problem

Hair Binding

In your binding asset in the character asset blueprint, plug in the hair.  Now the hair will attach to your character and follow them.  

Hair Attached to Character

Hair on UE4 Man in World

In Unreal Engine i found that the groom settings in general are nice.  Very easy to navigate and try new settings out.  The strands tab works with how your hair looks on a strand basis.  The most common settings you will use is hair width, hair root scale, and hair tip scale.   Another fun setting is the hair clip scale.  
UE4 Strands Settings

I noticed that the hair didn't really move on the top of the head so I  added some physics to the hair.  Physics helps make the move appropriately depanding on what the character was doing.  In the groom physics setting you can enble simulation.  This makes the hair jiggly.  You can also use air drag, bend damping, and bend stiffness.  

Gif of Jiggly Hair 

After getting jiggly hair I decided to change the color of the hair.  By default the hair comes in blond.  I created a new material and in the shading model I changed it to hair.  Under usage change it to used with hair strands, it won't work otherwise.  I created a simple hair shader with just color, scatter, specular, and roughness. 

Red Hair

To experiment with Physics further, I put the hair that is first generated in blender into unreal engine and messed with the physics.  I was really curious as to how it would look.  I've come to learn that sometimes physics can change the look of your hair all together.  It had a difficult time rendering the shadow so it would put a box over the character. 

Extremely Long Hair in UE4

To get some more practice, I created my friend Abi's hair.  her hair is partially saved on one side and is a bright blue color.  To start I brought the UE4 women into Blender and selected the geometry I wanted to generate hair on and instead of creating a group for it, I duplicated it.  I then generated my hair particle system on it. 

Hair that is Similar to Abi's

UE4 Women in Blender with Hair Particle System

In total to create Abi's hair it took me 7-8 hours.  This being my second time creating a hair style, I learned more about each of the tools and some of the other setting they have which helped a lot with solving problems such as evening out the shaved part and fixing bald spots.  Sometimes when fixing the hair blender would also apply it to the other side of the head so I had to constantly check and make sure I didn't make this mistake.  I also had to go between object and edit mode to see the hair.  In edit mode the hair turns black and to make sure the strands were going in the correct direction in was a constantly switching back and forth. 

Abi's Hair in Edit Mode

To create Abi's hair color I tried a different approach.  I learned how to use the texture paint tool in blender.  Its's similar to the node editor in Maya or blueprints in UE4.  I also checked the UV's so that it filled the entire UV space and unwrapped it.  Texture paint has many interactive tools that allow you to quite literally paint texture onto the hair.  I learned that when you are painting, you are paining on the root of the hair.

Shader Tab in Blender

Gif of Texture Paining Abi's Hair

Currently I'm coming up with a solution to bring Abi's hair color into Unreal engine.  I tried a different method where you create a separate geometry and line it up with the hair and then you unwrap the geometry and scale it's size.  After that you bake Abi's hair texture to the object and export it into unreal engine, But for now I have her in unreal engine with a simple shader to create her blue hair.  

Abi in Unreal Engine

Monday, July 19, 2021

Hair Cards in XGen

 Out of my own curiosity, I learned a little bit about how hair in games is created and about the artists that specialize in creating hair.  One of the methods I learned about was making hair cards, a polygon strip with a picture of hair on it, which is how hair is traditionally made for games.  The art of creating hair as I've come to learn requires a lot of time and patience to look good with the hair card method.  

As this is my first time using XGen, I created a hair card with a simple strand of hair and learned about how XGen works.  

Final Result of Hair Card Rendered in Arnold

To start the process of creating a simple hair card I created a polygon plane that I scaled and cleaned.   I also created a naming convention as XGen is very particular with naming conventions, created a description and added some guides to my geometry. 

Outliner View with Description and Guides

Geometry and Adding Guides


From watching the process of several groom artists, I learned that guides are extremely powerful.  They can control how long the hair is but they can also place, shape, and orient the primitives that are generated on the polygon meshes.  The primitives are the brown pieces of hair that appear when I push the eye icon on the XGen tab.  This is how the hair generates and if you shape the guides and push it again, the primitives update.  

Gif of Lengthening a Guide and Generating the Primitives to Update

To shape the guides, you need to manipulate the CVs.  Similar to how to create a custom rigging controller except you are shaping the strand!

Gif of Manipulating CVs on the Guides

Besides shaping the guides, I also learned about the tube shader.  The tube shader is a setting in XGen that applies a tube like shading to a flat plane.  This made me realize that the strands of hair are really flat planes.  Often times this setting in XGen is turned on to help the view the strands of hair better.  

Gif with Tube Shade Turned On

Gif Without Tube Shade

Some other really fun settings I learned about was the Density, Length, Width,Taper,Taper Start, Tilt, and Around.  These settings allow the user to edit the hair.   
Density - Gives you more or less hair (Generator Type Attribute)
Length - How long or short your hair is.
Width - How thick the individual hairs are
Taper - thins or thickens the edge of the hair
Taper Start - Allows you to control where the tapering is happening
Tilt - Lays the hair down flat on the card
Around - Brings the hair around town

Gif of Density Setting Example

Gif of Length Setting Example

Gif of Around Setting Example

One of my favorite parts to creating the hair card was learning about the painting mask.  When you originally generate the primitives, they generate in random places.  When you create a painting mask, it allows you to paint in the area on your card that you want your strands to appear.  After pushing the eye icon in the XGen tab the primitives will generate in that area.  This reminded me a lot about weight paining.

Gif of Painting a Mask for Hair


Some other settings that I learned about was that adding more CV's to the guides will actually smooth out the hair.  A good rule of thumb with the guides is that their length is always 1.  Adjusting the CV's will not add tot eh length attribute.  When you generate the hair their length attribute is 1 but it is coming from the length of the guides.  I also learned that a good width for characters is 0.10 or 0.12.  The width ramp is also a very useful tool as it helps with thickening and thinning out the hair in specific areas.  Hair is thinner by the roots, thickens out and then thins our again by the tips.

Hair Card with Width Ramp

Besides having fun with the painting mask, I also had a lot of fun with the modifiers.  There is a section in XGen that allows you to add a modifier that effects the whole card and it can create some really cool looks.  I also found that the more CV's you have on your guides the better the modifiers look.  I messed around with the Noise and Coil Modifiers.  

Selection of Modifiers in XGen

Hair with Noise and Coil Modifiers

To get a good idea on what the hair looks like, I created an Arnold render of the hair.  I applied an AiStandardHair shader and then used the Auburn preset

Arnold Render of Hair

Similarly to how modelers generate different maps for their models, we need to generate maps for the hair card.  The maps I found that needed to be created was the color, specular, normal, ambient occlusion, direction, and opacity.  For the color map, I found that you cannot just have a regular shader, there are several attributes that give you color.  So to get the color map, I used an HDRI to get the proper lighting and create my color map.

Color Map

The occlusion map is basically the alpha map.

Ambient Occlusion Map

For my AOV's , Direction, and Normal map I learned about the Shuma Hair AOV's tool.  It helps by creating some shader nodes to create these specific maps.  The AOV map is the most important map since it create the depth and it drops shadows between the hairs.   I also learned about a cool way to reduce anti-aliasing by putting a plane behind the hair and giving it an aiFlat and making that an mid grey color.

AOV Map

Learning about the Direction Map was a new type of map for me.  This map looks at where the specular is through out the hair and how it travels.  This helps create realistic hair.

Direction Map

I also created the normal map which adds a little bit of bump to the hair.  Some hair will look like they are on top of one another and it creates volume.

Normal Map

For fun I created the Specular map but it is not needed.  It created the lines that play witht eh straightness of the hair and breaks up the specular so that there is no perfect specular.  This map can be created in engine.  

Specular Map

Zenko Rig Reel

Zenko Rig Reel Zenko was my capstone character that I rigged and animated for Zenko: A Fox's Tale.  He is built to have a very reactive ...