Wednesday, April 21, 2021

No Country for old Men Sprint #7

 For this sprint I worked on three different assets, the phone, shotgun, and bi-fold door.  For this sprint I've come closer to having a solution for the phone cord connection to the phone base and ear piece.  After doing some research I played around more with the phone cord skeletal mesh and using a cube I was able to get it to connect and stay connected to the cube with physics.   It took me many tries as often times the cord would detach from the cube or fly into space.  

Gif of Phone Chord Physics Test

From this step I then connected another cube on the other end of the cord and turned off the physics to see how it would react.  It reacted mostly as expected.  The cord does have some unexpected bounciness to it but the cube on the other end is staying full in tact. 

Gif of Phone Chord Connected to Objects Test

When I simulated both cubes I did find that the cord and cubes reacted as expected.  To make it easier for my team I tried to re-create the same effect with the cord and the actual phone base and ear piece as a blue print with no luck.  It seemed to break every time.  I also selected the entire creation of the box version I made in the outliner and create a blueprint from selection which also resulted in no luck breaking both the version in the outliner and the blueprint.  


Gif of Phone Chord and Gravity Test

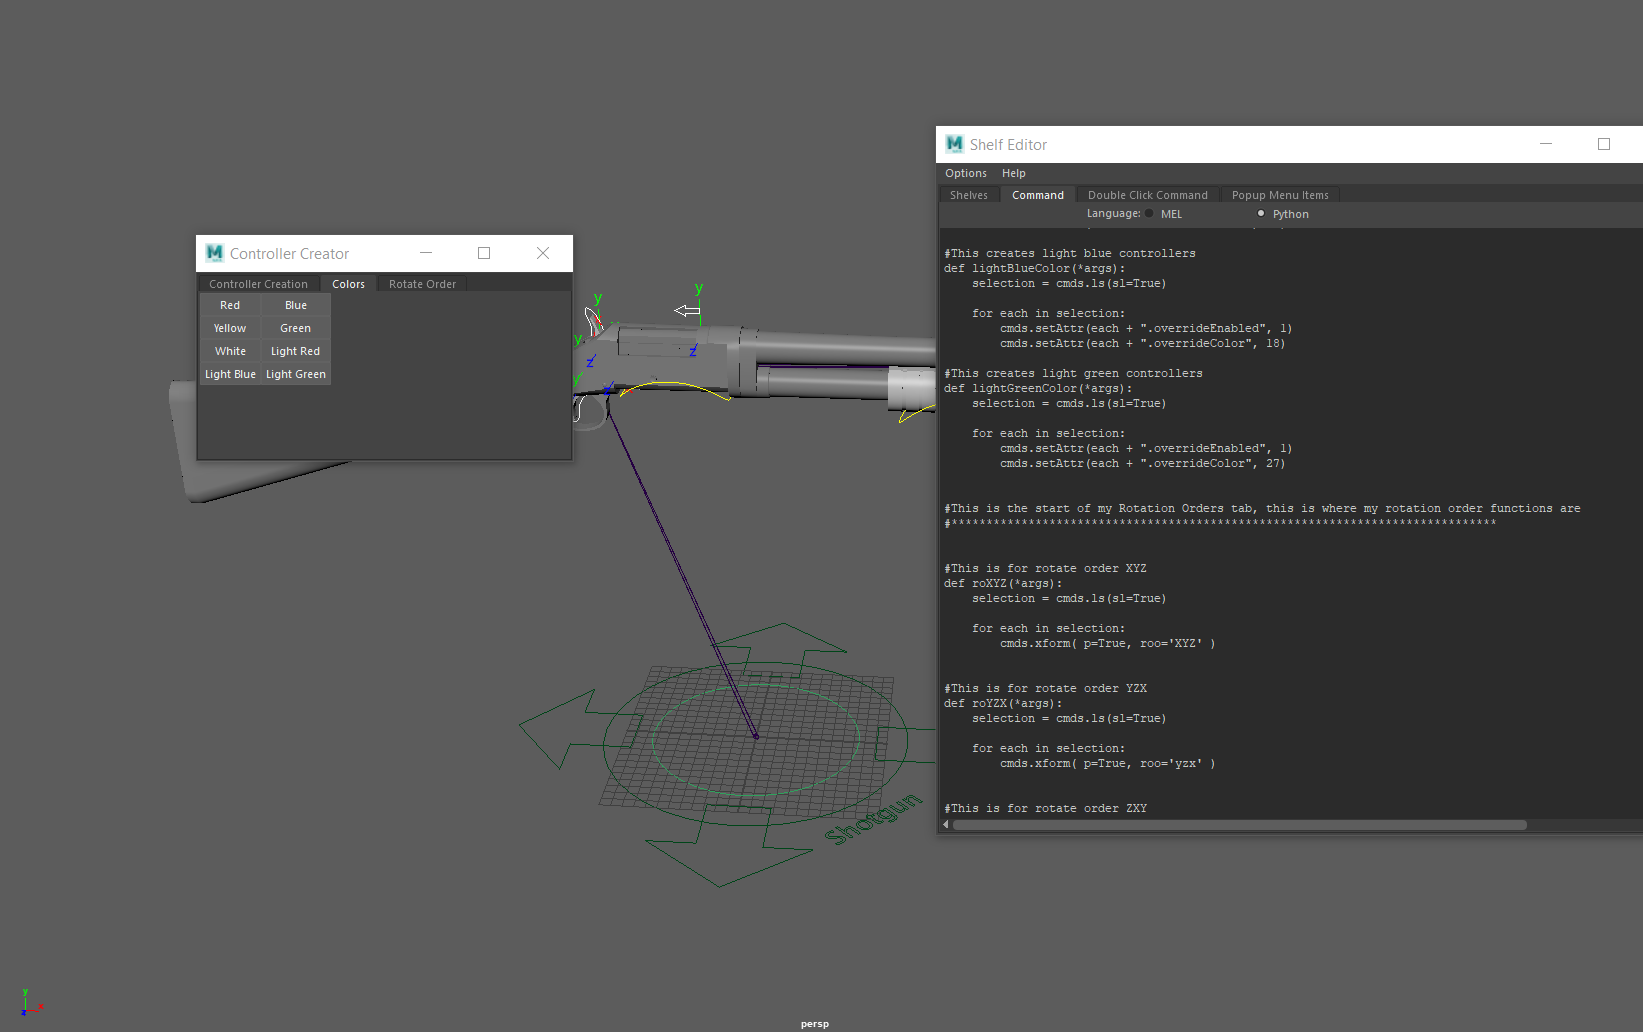
Aside from working on the phone cord I also updated the controllers on the shotgun rig.  I adjusted the placement of the shotgun which resulted in a slight skeleton change.  This is to make the rig a bit easier to work with.  

Shot Gun Rig

From here I also added in animator friendly parenting locators.  These locators are for the animator to parent their characters hands to so that then the hand moves that part of the shotgun will move too.  


Shotgun and Animator Friendly Grab Locators

After talking so some of the animator alumni, they said they like it when these locators are scaled up so that they know that they are there for them to parent the characters hands too.  So I scaled up my locators and made sure that they were visible.  


Shotgun and Visible Animator Friendly Locators 

The last asset I worked on was a Bi-Fold door (closet door).  I looked at a lot of bi-fold doors on the internet and watched how they moved.  There is two doors but some of the images I may only show one of the doors.  I started with my joint placement and was really trying to pay attention to where the joints were placed because of the way the door has to move.  


Skeleton in Bi-Folding Door

Originally the door was modeled completely straight which is not good for IK handles.  My thought process was to use an IK handle to create the movement of the door folding when opening.  Without some bend in the joint chain the IK handle does not know which direction it needs to bend.  So while waiting for the model to update I started to get ideas for my controller design.  


Bi-Fold Door Rig

I also updated my controller generator which helped me to create some of the controllers.


Bi-Fold Door and Controller Generator Tool

I ended up taking out the extra rotation controller since the basic movement of this rig was really just opening and closing the doors and some basic knob turning.  There was a model change with the door so I did change the skeleton to fit the new door.  


Adjusting Bi-Fold Door Rig to New Model

After the model changed I updated my hierarchy and put in my basic IK Handle and tested it out to see how it would move.   

Bi-Fold Door Hierarchy

Once I got my basic movement down and I skinned it, I was actually unhappy with the rig.  I saw a few small problems and the movement wasn't what I was looking for so I spent a little time and deconstructed the rig and adjusted it so that it would look nicer and I re-skinned it. 


Skinning Bi-Fold Door

I then tested out the movement and showed my team the rig fully skinned and working.

Gif of Working Bi-Fold Door Rig

And then it was ready to be put into the engine!

Bi-Fold Door in Unreal Engine 4

Friday, April 2, 2021

No Country for Old Men Sprint #6

 For this sprint I continued to work on the phone asset and the rig for our shotgun.  The goal for the phone is to have it be able to move and react based on what the phone base and the ear piece are doing.  The first step to achieve this is to set up the cord, phone base, and ear piece and place them in the scene.  This was taken in our dummy level before it was brought into our main level.


Chord Connected to Phone Base and Ear Piece

I began to work on the physics constraint between the cord and the phone static meshes.  The physics constraint is located on the cord and takes two points it is connected to.  The two points connected is the phone base and the ear piece.  Once I connected the phone I made sure that the phone base did not have simulation turned on and that the ear piece did have simulation turned on

Phone Chord and Physics in Unreal Engine

From here I tested to see how it would react to the environment.  The connection between the phone base and the ear piece worked as expected, however the cord between the two did not stay connected and acted as it did in the previous sprint. aw  

Gif of Broken Phone Chord Physics

For the shotgun rig I did some simple joint placement, controller creation, and updates in unreal engine.  I created an initial skeleton and ran some tests with parent constraints and some simple controllers to make sure the parts were moving properly with the joint placement.  

Shotgun Joint Placement

Shotgun with Controller Placement and Early Controller Generator Tool

Once I got an initial idea for the skeleton I made a folder within our rig folder for the shot gun and imported it so that the skeleton does exist in the project and is easy to update. 

Shotgun Rig in Unreal Engine 4

From here we noticed that one of the parts of the shotgun was connected to the main part of the shotgun instead of it's own piece so I went into UE4 and found the individual piece that was connected and exported it so I could bring it into the rigging file.  I also Exported the main part of the shotgun do that it is disconnected. I also imported a shot gun shell as I will need to rig the shells coming out of the gun when it shoots.

Shotgun Piece that Needed Adjustment in Rig

Updated Shotgun Rig

To understand how a shotgun works and the mindset that goes into rigging weapons I did some research and I got ideas on how to rig the shotgun so that it looks correct.  From our shotgun modeler I looked closely at a video he sent which explains how the shotgun works.  Check out this shot gun video!  I also looked at Simon Mills rig for a machine gun and listened to his logic and the way that he likes to think about rigging weapons. Check out Simon Mills machine gun video here! From here I then updated the rigging file and I updated a tool I am currently programing to help me create controllers quicker. 

Shotgun Rig Updated and Updated Controller Generator Tool

Once I updated my controller I skinned the shotgun to it's corresponding joints and used flooding so that it would have a mechanical feel when all the parts move.   The big consideration here is the fact that on a shotgun everything is very mechanical and rigid.  When the shot gun pump is moved the rest of the shotgun react to that in a series of mechanical steps.  

Shotgun Rig Skinned

Once I finished skinning the shot gun I updated it in unreal so that our other tech artist can also start to play around and test how it reacts in the scene.  Other considerations for the shotgun rig is how much recoil movement I should build in the rig, how does ammo show when the player shoots and how much ammo will the player get, and if the shot gun can be taken apart.

Zenko Rig Reel

Zenko Rig Reel Zenko was my capstone character that I rigged and animated for Zenko: A Fox's Tale.  He is built to have a very reactive ...