Wednesday, April 21, 2021

No Country for old Men Sprint #7

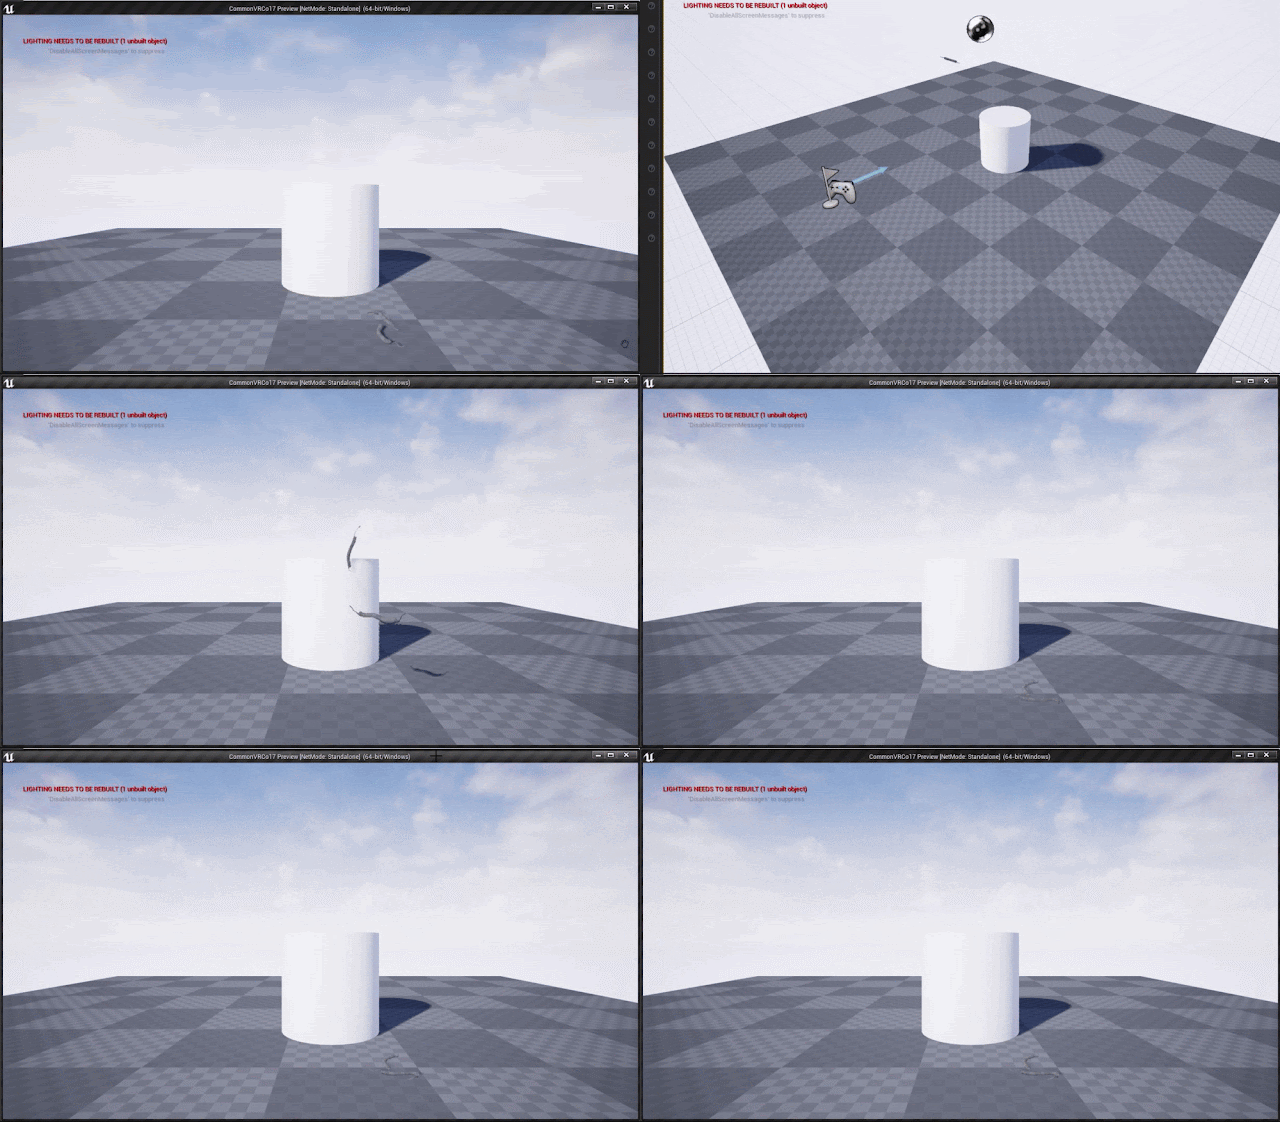
 For this sprint I worked on three different assets, the phone, shotgun, and bi-fold door.  For this sprint I've come closer to having a solution for the phone cord connection to the phone base and ear piece.  After doing some research I played around more with the phone cord skeletal mesh and using a cube I was able to get it to connect and stay connected to the cube with physics.   It took me many tries as often times the cord would detach from the cube or fly into space.  

Gif of Phone Chord Physics Test

From this step I then connected another cube on the other end of the cord and turned off the physics to see how it would react.  It reacted mostly as expected.  The cord does have some unexpected bounciness to it but the cube on the other end is staying full in tact. 

Gif of Phone Chord Connected to Objects Test

When I simulated both cubes I did find that the cord and cubes reacted as expected.  To make it easier for my team I tried to re-create the same effect with the cord and the actual phone base and ear piece as a blue print with no luck.  It seemed to break every time.  I also selected the entire creation of the box version I made in the outliner and create a blueprint from selection which also resulted in no luck breaking both the version in the outliner and the blueprint.  


Gif of Phone Chord and Gravity Test

Aside from working on the phone cord I also updated the controllers on the shotgun rig.  I adjusted the placement of the shotgun which resulted in a slight skeleton change.  This is to make the rig a bit easier to work with.  

Shot Gun Rig

From here I also added in animator friendly parenting locators.  These locators are for the animator to parent their characters hands to so that then the hand moves that part of the shotgun will move too.  


Shotgun and Animator Friendly Grab Locators

After talking so some of the animator alumni, they said they like it when these locators are scaled up so that they know that they are there for them to parent the characters hands too.  So I scaled up my locators and made sure that they were visible.  


Shotgun and Visible Animator Friendly Locators 

The last asset I worked on was a Bi-Fold door (closet door).  I looked at a lot of bi-fold doors on the internet and watched how they moved.  There is two doors but some of the images I may only show one of the doors.  I started with my joint placement and was really trying to pay attention to where the joints were placed because of the way the door has to move.  


Skeleton in Bi-Folding Door

Originally the door was modeled completely straight which is not good for IK handles.  My thought process was to use an IK handle to create the movement of the door folding when opening.  Without some bend in the joint chain the IK handle does not know which direction it needs to bend.  So while waiting for the model to update I started to get ideas for my controller design.  


Bi-Fold Door Rig

I also updated my controller generator which helped me to create some of the controllers.


Bi-Fold Door and Controller Generator Tool

I ended up taking out the extra rotation controller since the basic movement of this rig was really just opening and closing the doors and some basic knob turning.  There was a model change with the door so I did change the skeleton to fit the new door.  


Adjusting Bi-Fold Door Rig to New Model

After the model changed I updated my hierarchy and put in my basic IK Handle and tested it out to see how it would move.   

Bi-Fold Door Hierarchy

Once I got my basic movement down and I skinned it, I was actually unhappy with the rig.  I saw a few small problems and the movement wasn't what I was looking for so I spent a little time and deconstructed the rig and adjusted it so that it would look nicer and I re-skinned it. 


Skinning Bi-Fold Door

I then tested out the movement and showed my team the rig fully skinned and working.

Gif of Working Bi-Fold Door Rig

And then it was ready to be put into the engine!

Bi-Fold Door in Unreal Engine 4

Friday, April 2, 2021

No Country for Old Men Sprint #6

 For this sprint I continued to work on the phone asset and the rig for our shotgun.  The goal for the phone is to have it be able to move and react based on what the phone base and the ear piece are doing.  The first step to achieve this is to set up the cord, phone base, and ear piece and place them in the scene.  This was taken in our dummy level before it was brought into our main level.


Chord Connected to Phone Base and Ear Piece

I began to work on the physics constraint between the cord and the phone static meshes.  The physics constraint is located on the cord and takes two points it is connected to.  The two points connected is the phone base and the ear piece.  Once I connected the phone I made sure that the phone base did not have simulation turned on and that the ear piece did have simulation turned on

Phone Chord and Physics in Unreal Engine

From here I tested to see how it would react to the environment.  The connection between the phone base and the ear piece worked as expected, however the cord between the two did not stay connected and acted as it did in the previous sprint. aw  

Gif of Broken Phone Chord Physics

For the shotgun rig I did some simple joint placement, controller creation, and updates in unreal engine.  I created an initial skeleton and ran some tests with parent constraints and some simple controllers to make sure the parts were moving properly with the joint placement.  

Shotgun Joint Placement

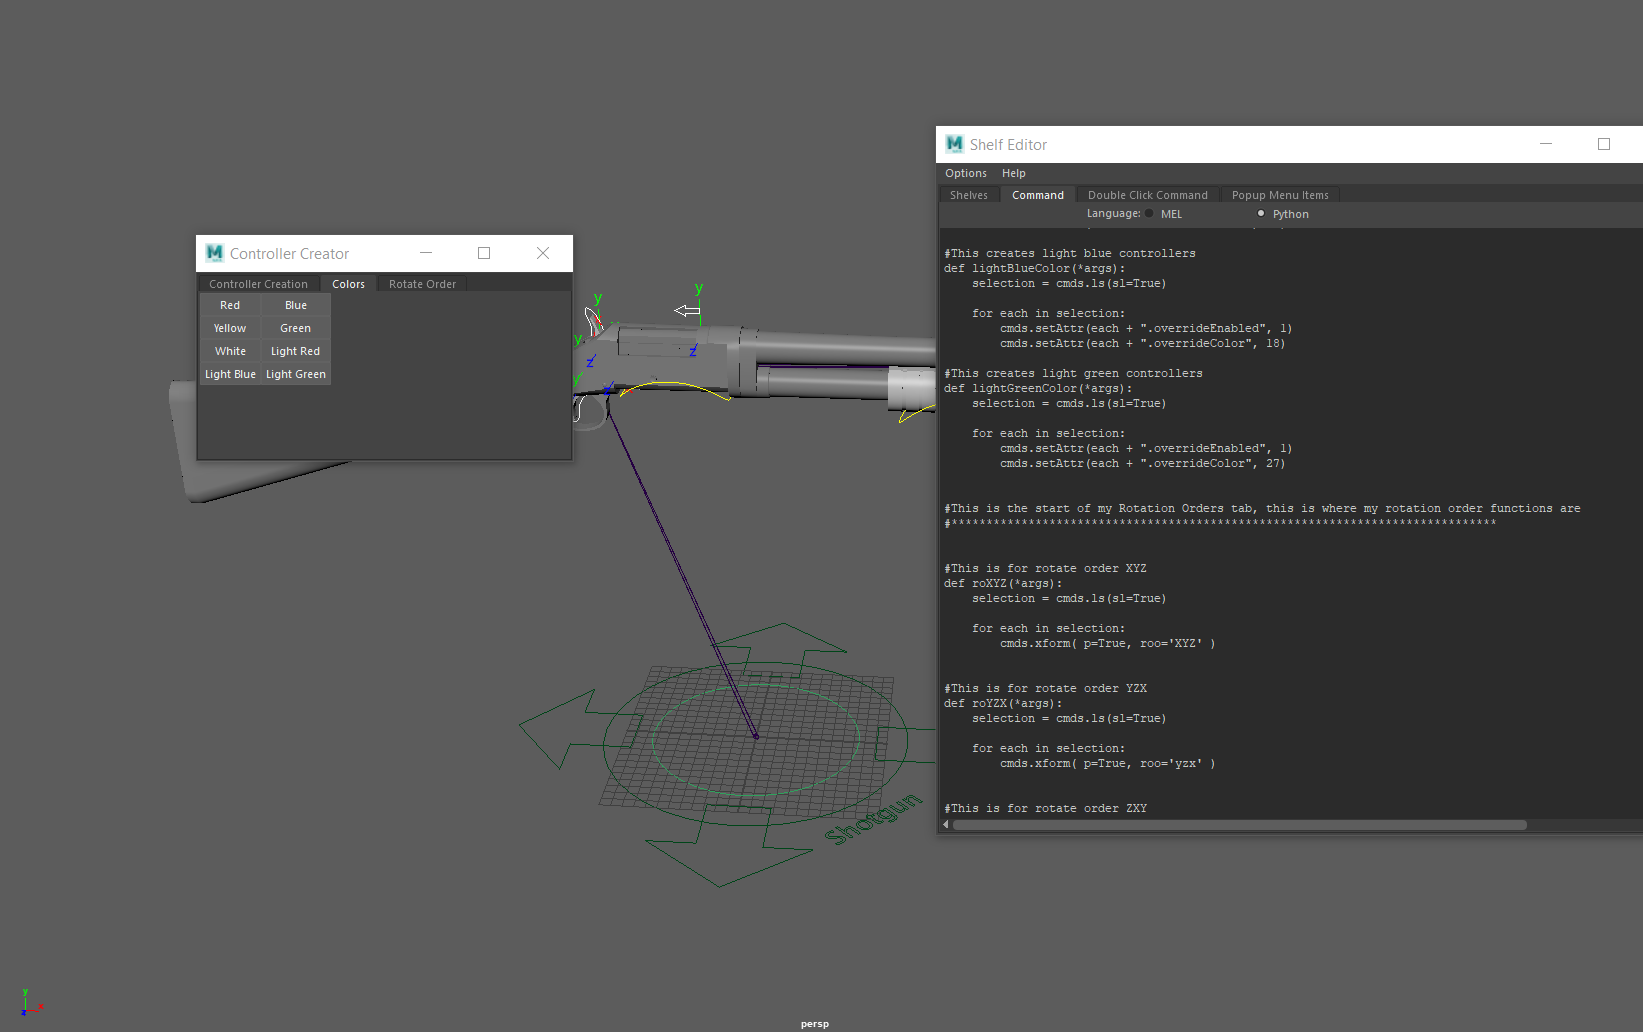
Shotgun with Controller Placement and Early Controller Generator Tool

Once I got an initial idea for the skeleton I made a folder within our rig folder for the shot gun and imported it so that the skeleton does exist in the project and is easy to update. 

Shotgun Rig in Unreal Engine 4

From here we noticed that one of the parts of the shotgun was connected to the main part of the shotgun instead of it's own piece so I went into UE4 and found the individual piece that was connected and exported it so I could bring it into the rigging file.  I also Exported the main part of the shotgun do that it is disconnected. I also imported a shot gun shell as I will need to rig the shells coming out of the gun when it shoots.

Shotgun Piece that Needed Adjustment in Rig

Updated Shotgun Rig

To understand how a shotgun works and the mindset that goes into rigging weapons I did some research and I got ideas on how to rig the shotgun so that it looks correct.  From our shotgun modeler I looked closely at a video he sent which explains how the shotgun works.  Check out this shot gun video!  I also looked at Simon Mills rig for a machine gun and listened to his logic and the way that he likes to think about rigging weapons. Check out Simon Mills machine gun video here! From here I then updated the rigging file and I updated a tool I am currently programing to help me create controllers quicker. 

Shotgun Rig Updated and Updated Controller Generator Tool

Once I updated my controller I skinned the shotgun to it's corresponding joints and used flooding so that it would have a mechanical feel when all the parts move.   The big consideration here is the fact that on a shotgun everything is very mechanical and rigid.  When the shot gun pump is moved the rest of the shotgun react to that in a series of mechanical steps.  

Shotgun Rig Skinned

Once I finished skinning the shot gun I updated it in unreal so that our other tech artist can also start to play around and test how it reacts in the scene.  Other considerations for the shotgun rig is how much recoil movement I should build in the rig, how does ammo show when the player shoots and how much ammo will the player get, and if the shot gun can be taken apart.

Friday, March 19, 2021

No country for Old Men Sprint #5

 For this Sprint I was working a lot with troubleshooting physics going into the ground.  Recently we updated the collisions so many of our props began to break into our scene with the new update.  The asset I worked on the most was the phone.  I iterated this asset about 5 times and came up with a solution for the cord physics.  Originally the phone was all one geometry and this caused multiple issues in the physics editor.  

Gif of Broken Phone Chord Physics When Dropped

The geometry would go into the ground and when interacting with different objects the physics would break and freak out.  Often times it would freak out infinitely and I had to close the physics editor in order to stop the simulation.  To solve this issue I had to break apart the rig and separate the geometry into pieces.  I did this in Maya and then exported just the cord geometry and the cord skeleton. We already had the phone base and ear piece separated and in engine.  To organize it apart from two previous iterations I created a new folder and kept anything that has to do with the cord physics in that folder.  

Separate Ear Piece Geometry

Separate Phone Base Geometry

For the cord physics I used the skeletal structure and created a capsule on each joint which is for the collision and then a constraint which is what keeps the joints moving based one what another joint is doing.  Having the ear piece and the phone base disconnected from the cord has made a major difference in how the cord interacts with the world.  The cord is simulating and is not based on calculations from the ear piece and the base.  To connect those two pieces to the cord physics I need to add a physics constraint on both ends of the cord and line up the geometry.  Unlike the previous versions, the ear piece and the phone base do not have a skeleton in them so they will just be a static mesh.  Currently the ear piece and the phone base are checked out and disconnected because were one of the assets that was effected by the update we did.  For more information on Physics Constraints this is some documentation for Unreal Engine: Unreal Engine Physics Constraint Documentation  

Phone Chord Physics Constraint

This is the cord in the physics editor with it's capsules and the constraints.

Phone Chord Physics Hierarchy

This is what the hierarchy looks like in the physics editor. 

Before bringing it into our level this asset has been tested several times in our dummy level.  You can see the difference on how it's reacting to the ground or when interacting with another object in the scene.  I really wanted to think about how the player is going to react in the situation.  Some players will interact with it and may throw it so having the cord react to the environment in a more expected way was a big feat.  It is a lot bouncier then I thought it would be!

Gif of Phone Chord Physics When Dropped

So besides testing it out in our dummy file this asset has been tested with our other tech artist to see how it will react when it is picked up.  In the past this asset would disappear out of the scene if you tried to pick it up or it would disappear if you brought it into the scene.  Currently it interacts with the scene as expected however it will not allow the user to pick it up.  If the user interacts with it, it will just lay where it was dropped or placed.  We do have a blueprint that should be taking care of the user pick up situation, however both the other tech artist and I are at a slight lost as to why it won't let the user pick it up and interact with it.  

Blueprint For Phone Chord Pick Up  

The other asset I have begun to work on is the shot gun rig.  This asset is very early as this one was just recently given to me to work on.  I've never worked on a gun rig before, this rig will really be the first prop-rig I've worked on besides the phone.  The phone has a very different pipeline then the gun rig will have.  Since I've never seen what a gun rig looks like I took some time to see what they look like.  

Gun Rig References

After seeing what rigs look like for guns and having the modeler bring me through where it's suppose to move I set up a maya file and exported the shot-gun proxy from UE4 and placed it in my special folder for my prop exports and created my project folder for this asset. When I first brought it into maya I was surprised to see what it looked like as it came in as a block but then I figured out how to get the shot-gun to appear. 

Shotgun Geometry when Brought into Maya from Unreal Engine 4

Fixed Shotgun Geometry in Maya


Friday, March 5, 2021

No Country for Old Men Sprint #4

 For this sprint I worked a lot with the phone in the scene.  As I have never worked with physics before in UE4 most of the time I am doing research to try and figure out how physics works in UE4.  I have never even opened this window in UE4 before. The hardest part to get correct on the phone is the cord as when it interacts with the world, it tends to get a bit crazy and go all over the place.  I have actually iterated the physics for this asset three times as it is difficult to determine how it is acting in the VR.  I test this asset out on a basic level just to see how it interacts with the ground and get an idea for the weight and to see how the cord is reacting between the phone and the base.  

Gif of  Phone Chord Reacting to Being Dropped 

This is how the phone is acting currently.  I put a cylinder in the scene to see how the cord is reacting when the phone and the base are going in different directions.  Typically to have any idea as to how it is working on the VR end, the other tech artist on the team will let me know during common art class.  This current set up includes bones, constraints and containers and from there it's a lot of working with the settings and seeing how the phone is effected. 


Phone Chord Hierarchy

  This is part of the hierarchy to get the phone working currently.  I actually created the joint hierarchy in Maya and brought it over to UE4.


Phone Chord Physics Test in Physics Editor

This is one of the tests I did to try and understand how the physics is working.  In one of my other iterations the geometry does not go into the ground but after I added the constraints it seemed to be able to go into the ground again.  If you select the joint you can see it moving all over the place. 

Phone Chord in Physics Editor

This is what the colliders looked like when they didn't go into the ground and I'm thinking of bringing this back and seeing a difference between the two and which one gives a better solution. 

Phone Pick Up Blueprint

As this asset is going into the VR I did create some blueprints to allow it to be picked up.  This needs to be tested again to my knowledge as when he tried to pick up the phone it was running away and was completely out of the scene room.  We found this problem to be because of the collisions on the floor and walls of the room. 

Broken Phone Physics in Physics Editor

While working within the physics interface for the first time, this is one of the problems I came across.  Physics can be finicky and tends to break easily.  I found this to be fun but I also had no idea what caused the problem to occur.  This is the phone rotating around and catching speed but also never ending going around the environment like this.

Crazy Joint Movement in Physics Editor

 This was another problem I came across where the joints began to grow and also move around a lot and never end.  This one was caused when I adjusted one of the constrains.  Originally I turned on and off simulation to see if it would reset but it actually made it worse. 

Friday, February 5, 2021

No Country for Old Men VR Project Part 1


 For this project I'm working on a team of 5 to create a virtual reality experience for No Country for Old Men. I'm working with three modelers and one other tech artist. The virtual reality experience will be done in unreal engine and before this post we build a white box of our environment and some very simple lighting.  Some documentation was also made to keep our team on track.  For this sprint I worked a lot on research, analyzing our environment, dummy lighting demos, shader creation and initial rigging for our phone prop.  

Before I get into all the fun art I needed to analyze our scene and really look at everything that is happening to understand how the world of No Country for Old Men needs to be created.  Our amazing modelers can create all the props, scale the props, and build the scene with their creations but there are other factors that need to be considered and looked at so I created a document and documented the lighting, SFX, and went over our animation style for our scene based on our clip in the Eagle Pass Hotel and a talk with our project lead.  

For our special effects, the main one is the gun shot that comes from both the player and Anton (bad guy).  The special effect would be created using Niagara and would either be a particle or flash effect.  The special effects under consideration is the drapes by the windows, shattered glass, and wood splints.  These are under consideration because either they could be created a different way using rigging or it depends on if we have time for it. 

Gun shot example from the scene

Gunshot Moment

Drapery by the Window

When looking at the lighting in the scene, I was seeing how the lighting was telling the story and there was a hot and cold color combination.  The main lighting comes from the lamp on the bed.  The secondary lighting comes from the windows which is the outside world and the third lighting source comes from under the door.  There is a fourth light source that comes from the character weapon when fired and there is a small flashing red light on the tracker the player will find.  In our project scene, there should be one main directional light that is set to moveable and is the only light that gives shadows.  Most of the lighting in the scene is warm unless it is going through the drapes by the window.  The lighting through the drapes creates a cool blue color.  The lamp by the bed creates a warm yellow tone and the outside world has a warmer orange tone if it is not going through the drapes.  Under the door is a light yellow tone you typically see in an old hotel hallway.

Hallway light and lighting through drapery example

Lighting in the Hallway


Lighting Through the Windows

Lamp Lighting

Lighting from under the Door

After talking to the lead on our team, we determined that our animation style is realistic, it is suppose to be like we are actually in the scene.  There is potential for use to unitize mocap data or mocapping an actor to act like Anton.  Mechanically for Anton he could always be aiming or he would have an anim state machine with blueprints for animation logic that would either have a timer for when he sees the player.  

Anton in the Hallway


Now for the fun art part!  
All of this is not in our project file yet as this is in a dummy file while everything is still being put into our project file.


To start the lighting process I began by creating a dummy shader that would go on the lamp next to the bed. The lamp next to the bed is transparent enough to let light out but it's not so transparent that it's not that something isn't there. To refresh my memory on materials and shaders, I looked up some documentation on the editor and transparency from the UE4 documentation:

So I then began to create the shader for the light and I put the blend mode on it to translucent and this changed by settings on the material editor quite a bit.  I messed around with it a little bit and closely replicated the color to the color on the lamp in the scene.  Currently I am messing with the opacity and then moving forward to give the shader some texture.  To get this shader correct, there is a lot of testing with lighting and geometry.  I created a quick lamp shape using Maya to bring into my scene for testing the shader and the lights.  The lighting for the lamp is not an emissive shader but a physical light inside the geometry and passes through the shader. 

Lamp Transparency Shader


Lamp Transparency Shader in Material Editor

Lamp Transparency Shader Attached to Object with Light

Besides creating a very simple dummy shader, I also created a dummy scene to give an idea as to where the lights should go. The main light source is the light from the lamp and the secondary is from the windows.  There is two spot lights with an orange tint towards the left of the scene and a point light that is inside the lamp.  I did not get an example from the door as in this dummy scene there is no door.  Next sprint I should be applying the lighting concepts from this scene to our actual project file with more lighting updates.


Lamp Transparency Shader with Mannequin 

Lamp Transparency Shader against wall

Just recently I got my hands onto my first prop to rig which is a telephone that sits on the nightstand. As I've never rigged props before, I went to the animator discord with animators from previous FIEA cohorts and asked them questions.  Multiple animators answered with the features they like to see on props and one of them from cohort 15 pointed out that for VR it's a matter if the player is interacting with the phone or if the animator is animating it in the scene.  If the player is interacting with it, which we are planning on having, then to talk to the project lead to discuss what specifically needs to be built into the phone, essentially what is most important. I then looked at example of phone rigs to get an idea as to what the hierarchy looked like. 
After talking to the project lead I created a document for the phone prop an documented what needs to be built into the phone rig. It should be able to spin it's dial and the player should be able to bring the ear piece to their ear.  There should be a parent of some sort to put the ear piece back onto the phone base.  The chord on the phone needs some physics and should react when the player picks up the ear piece.  The phone itself could have the potential to be thrown. 


Phone Rig Example

With all of this in mind I then began to create my hierarchy and joint layout for the phone.  For the cord it is super important that the joints have even spacing so I took time and adjusted the joints that needed to be moved.  I also went through and gave the joints their naming conventions on the joints.  

Joint Placement in Phone

Top View of Joint Placement in Phone

Phone Joint Hierarchy


Tuesday, January 5, 2021

Tarantula Proxy Rig Test

Tarantula Proxy Rig Test Reel 


 My favorite specialization in the CG world is rigging.  Watching the characters come to life when you create digital bones and joints, attaching a controller, and then creating the skin deformations.  From there you get to see the animators do what they do best, create the acting of the characters.  I was challenged with creating a rig for a character that has more than four legs and I chose to do a Tarantula!  I am not responsible for creating the model,  I found the model on sketchfab!


To start my rigging process, I did a lot of research on the tarantula anatomy and looking at how they move.  I also looked at how other people rigged spiders and tarantulas to see their approach.  Did you know that tarantulas are considered to walk on 8 legs but when they are little they actually walk with 10 legs?  Tarantula's have what's called a pedipalp that they use to grab their prey with but then they are little, tarantulas use it to help them walk.  Sometimes when they get older they will still use them for that purpose. 

Tarantula Reference

To really begin my process, I had to do a lot of research on how tarantulas move besides looking at anatomy.  I also asked many animators what is the first thing you would do to a rig that has more than four legs?  The answer I got was that they would check how the legs react to how the body moves.  Knowing this I knew that this rig had to be very much IK built in each of the legs and the pedipalp.  To start the rigging process, I began with cleaning up the model and hiding all of the legs and fangs until all that showed was the torso and the tail (abdomen)

Tarantula Body Geometry

·         To start the rigging process I placed my joints in the model and then from there I began to build and think about the functionality.  The torso on the tarantula is made up of a simple FK chain that has a clean hierarchy that allows it to move smoothly. The animator should be able to manipulate the torso by translation, rotation and scale. The orientation of the joints for the torso is ZYX

Tarantula Body Joint Layout

From there I had to think about the hips and the tail(abdomen).  Because I wanted to create a game rig, I needed to connect the root joint but still have the ability for the animator to move the abdomen.  To created this, I have two joints right on top of one another with the hip joint (the one that controls the abdomen) parented under the joint the root is connected to.  I also began to think about the orientation of the joints.  The above image is before I changed the abdomen to XYZ. 

Tarantula Spinnerets joint Layout

Next, I worked on the Spinnerets and the fangs.  I created these to be simple FK chains that allow the animator to translate, rotate, and scale them.  In order for them to move I had to parent them under the joint in the parent chain that was closest to them.

Top View of Tarantula Rig

There is a total of three different hierarchies working together inside each leg to get it to work correctly.  The simplest hierarchy is the skin joints which are physically connected to the torso joints.  Both IK hierarchies are intertwined and there is a group for each IK leg (you will find them under the ctrl group) that is then in a bigger group to keep them organized and easy to maintain. As there is 10 of these groups I created an even bigger group that holds all of them so that they are easy to find.  If you look under a group called Leg_rigging you will find all 10 of these groups that holds all the IK legs. To find the Leg_rigging group it is under T_root_jnt.  To describe how the legs are intertwined, the ik leg has the first pole vector that goes from the pivot joint all the way down to the ball joint.  This pole vector is then parented under the anim controller so that the leg can be moved around.  The ik rig leg has two pole vectors that control the knees and the ball.  The pole vector for these are then parented under the ik leg group under the ball.  This is what intertwines these two legs.  To get this to connect to the skin joints, I took the joints from the ik rig leg and point and orient constrained the skin leg and this allowed them to all move and work together.  I have never tried this before and I was inspired to try this from several different rigs I saw and messed with. 

Zenko Rig Reel

Zenko Rig Reel Zenko was my capstone character that I rigged and animated for Zenko: A Fox's Tale.  He is built to have a very reactive ...