Sunday, August 15, 2021

Zenko Rig Reel

Zenko Rig Reel

Zenko was my capstone character that I rigged and animated for Zenko: A Fox's Tale.  He is built to have a very reactive spine that is easy to stretch and squash.  Unlike many rigs, Zenko is build with FK Space controllers in all four legs rather than regular FK controllers.  This kind of controller is great for characters that are in the air and creatures that fly.  I also build four visible pivots that the animator can use to show how the feet can lean.   Zenko also has two master controllers, visibility controllers, curvature controller in his neck, and a controller that controls which space the eyes are in.  Overall, Zenko was a very fun character to rig as he is the first character I have rigged for games.  Some of the considerations that went into Zenko's rig was the fact that his spine was not supposed to move like a regular fox.  His spine is inspired by snakes, ferrets, and cats.  We also wanted a lot of movement in his tail so there are a lot of controllers built to give fluid movement.  We also wanted a lot of expression in Zenko's ears as he does not have a facial rig.  Besides creating Zenko's rig, I also created Zenko's animations.  For his animations I looked at many fox videos and I captured over 60 clips of my dog Rivers doing many of the movements we were looking for Zenko to do.  I also created his original Character Sheet that broke down who he is as a character.  The beginning of this reel is clips from the Zenko release trailer and afterwards it shows off his rig.  The music is from Zenko: A Fox's Tale release trailer. 

Saturday, August 14, 2021

Lucy Rig Reel

Lucy Rig Reel

Lucy was a rig I did in my undergrad before FIEA.  Unlike the rigs I created in FIEA, she is built for film.  She appears as the secondary and hero character in the University of Central Florida's Character Animation short animated film, Delivery.  Overall, she has been the most difficult rig I've had to work on.  Some parts of Lucy were rigid, while others were flexible, and in some places she was both rigid and flexible.  What made Lucy so difficult was the fact that I was learning how to rig while rigging her and she is the most complicated character in the character animation program's history.  It took me my entire senior year, and a lot of very late nights, to rig her and make her perfect.  Some of the parts on her that really tripped me up was her collar, front paws, the skeleton spine on top of her actual spine, and adding the back toes to her back feet.  Each of these problems needed a lot of research to have it rigged correctly, hours of troubleshooting and testing, or both.  Overall, Lucy is my favorite rig I have created.  Anytime I show Lucy, everyone loves her character.  Because I created the animation for her while at FIEA, I added it to the beginning of her rigging reel.  The music is called Summer Time by MorningLightMusic.

Thursday, August 12, 2021

Lucy Walk Cycle Reel

Lucy Walk Cycle Reel

This is an animation I've worked on for a period of time.  Lucy was a character I rigged and animated in undergrad and has continued to be a character I'm constantly learning from.  With this animation I learned more about quadrupeds and how they move.  Quadrupeds are more difficult to animate then you might think.  My biggest learning experience with this animation was the idea of how her upperbody moves in correlation with how her lowerbody moves.  I also learned about adding fidgets to walk cycles and how they bring personality and life to characters.  I was very inspired by how my own dog Rivers moves and acts as both Lucy and Rivers have similar personalities.  Both of them also have similar physical characteristics such as big floppy ears.   One of the signature actions my dog does is to stick her tongue out and close her mouth with an excited and playful facial expression.  She does this when she's very excited to play with her toys.  With Lucy I wanted to have the same signature action but Lucy style with exaggerated movements in her ears and tongue.   I also learned more about facial animation as Lucy's face is a skull and in the moment she looks over, she needs to look happy and smile.  When Animating the head I actually never thought about the curves that the head motion makes.  The big indicator to visualize Lucy's curves was her nose.  I was constantly watching Lucy's nose to see what kind of curves her head motion was creating.  After understanding her head motion I worked on her ears and learned about how they drag behind and the floppy look they can give when being dragged.  Overall it was a super fun experience animating Lucy and learning more about characters that are just like her!  For animating Lucy I worked in Autodesk Maya 2020 and for rendering I used Pixar's Renderman!  The music is called Summer Time by MorningLightMusic. 

Wednesday, August 11, 2021

Persy Walk Cycle Reel

Persy Walk Cycle Reel

I've updated this reel from the previous reel that I created for Persy.  Since I created a walk cycle for Lucy, I decided to also create a walk cycle for the main character from Delivery, Persy.  Because I also typically work with animals, mostly canine like animals, I thought it would be a fun challenge to animate a biped too.  Persy's model and rig are from the University of Central Florida's Character Animation program "Delivery" film.  
My biggest learning curve from working with Persy was the fact that she has hair and it needed to move and react to how her head and body are moving.  I also learned that hair reacts and moves differently as you get further into animating the ends of the hair.  It's essentially long chain with each reacting to what the chain before it is reacting to.
Another big lesson was the animation curve Persy's arms created when moving forward and back.  I never thought about how arms gain and lose momentum and how the wrist and hands react to that movement.  As the arms lose momentum the wrists have follow through and catch up as the arms are beginning to gain momentum. The hands then also react as the fingers get closer and further apart. 
The last big lesson I learned was about facial animation.  Persy has her limits on her facial rig, she can be very expressive or very subtle.  If you combine  too many controller's Persy's face will start to cave inwards in some areas.  I have never been comfortable pushing Persy's face to it's limit but with this animation I really played around with what her expressions are and how I can creatively make her look happy without breaking her rig. 
Overall, this animation has taught me a lot about how the body moves on a biped and how it effects other parts for follow through animation.  This animation is definitely not quite completed yet as I need to work on Persy's fidget sometime in the near future!  The music in the reel is called Typography by MorningLightMusic.

Tuesday, August 10, 2021

VR Simple Shotgun Rig Reel

VR Simple Shotgun Rig Reel

This is a very simple shotgun rig I created for the No Country for Old Men VR experience in the common art class.  This rig has fully FK functionality and is able to move all parts of the shotgun.  For this prop I actually did some research and watched how shotguns work and watched people take apart and put together the shotgun.  Some of the considerations were how the player is going to interact with it, reloading, pumping, shooting and holding the weapon.  I learned a lot from rigging this weapon and this was my first weapon rig.  The model is by Eric McGinnis and the music is called Glock by NewsStreetMelody

Monday, August 9, 2021

VR Simple Money Case Reel

VR Simple Money Case Reel

This is a very simple rig created while in my common art class for a VR experience of No Country for Old Men.  The rig functionality needed to allow the case to be closed, opened, move the case handle, and can move the buckles on the case.  It is fully FK functionality and in the 3D world the player is able to interact and pick up this object.  The model is made by Desiree Gerlach and the music is called Glock by NewsStreetMelody.

Sunday, August 8, 2021

Tarantula Proxy Rig Reel

Tarantula Proxy Rig Reel

This is a rig that is currently in proxy mode and that I want to in the future update with more complex controllers and skinning.  Because I've worked on quadrupeds, I decided to try a creature that has more than four legs, so I chose to rig a tarantula.  I find tarantulas to be very interesting creatures in the way they move and behave.  The big challenge with this rig was how the legs move and the way the body reacts to that movement.  With the body of the tarantula being very rigid, trying to determine how the legs move was a bit of a challenge because part of the legs are under the tarantulas body.  It's difficult to see how the underside of a tarantula moves unless they are flipped on their backs.  My biggest surprise when rigging a tarantula, was learning that they sometimes actually walk on 10 legs especially when they are very young.  Tarantulas have limbs called the pedipalp that they use to grab their prey and they will use those to help walk.  To describe how this rig works the body is forward kinematics and each of the legs is inverse kinematics with a knee and ankle bend controller.  I found this model on Sketchfab by JMuro1 and the music is called Tarantulas by Christian Nanzell.  

Thursday, July 22, 2021

No Country for Old Men Sprint #12

 This week I worked on lighting and fixing the bifold door rig.  Earlier in the week I had level designer Joey critique the lighting I did in the level.  I messed around with the lighting in the hallway and tried to create two lights on both ends of the hallway.  Joey suggested having it a cooler color than a warm color. 

Placing Lights on Both Ends of the Hallway

After playing around with this idea I ultimately took out those lights and placed one light in the hallway behind the mannequin standing in for Anton.  After working with the hallway I went into the bedroom and checked the light complexity and found very little red.  The hallway by the light was in the orange range.

Bedroom Light Complexity

Hallway Light

 Since the bedroom was too dark, I added a few lights to brighten up the room so that the player can see better.  I also adjusted the settings on a few of the lights to blend them into one another.  

Adding Lights to Room

After many builds and changing settings on the lights I had my team test the lighting in the headset and I set images to three level designers for critique.  My team was able to see the room a lot better with the new lighting and I got positive feedback from the level designers. The biggest part of lighting that needs to be fixed is that there is no black and that the player should be able to see everything.  

New Lighting in Scene Angle #1

New Lighting in Scene Angle #2

Level Designer Brian Critique

Level Designer Teandre Critique

Level Designer Joey Critique #1

Level Designer Joey Critique #2

After having the professors also critique the lighting in the scene I took out the Sphere Reflection Capture and kept the Box reflection capture in the scene.  The lighting by the dresser was illuminating it too much so I also dimmed the ambient light in that area to still help the player see in that area but also have the dresser not look like it's glowing.  After messing with some of the settings we had an interesting issue with the shadows that appeared behind the fan on the dresser and an unknown shadow that appeared on the wall.  

Shadow Problem by Dresser

To combat this problem I changed the light mobility to stationary and dimmed the light down which made the odd shadows disappear.  I also turned off casts shadows. 

Shadow by Dresser Problem Solved

After working on lighting,  I got an update for the geometry used for the bi-fold doors.  I jumped into the rigging file after downloading the new geometry and imported it in.   I unbound the original geometry and deleted it out of the scene and then cleaned out the name space editor.

Old Bi-Fold Door Rig


Unclean Name Space Editor

After cleaning the name space editor I noticed that the door nobs were not in the same place as before so I hopped into the rig and disconnected a few constraints so I could move the door knobs back in place. I then constrained what I had unconstrained and checked to make sure the rig was still working as expected.  

Door Knob Fix

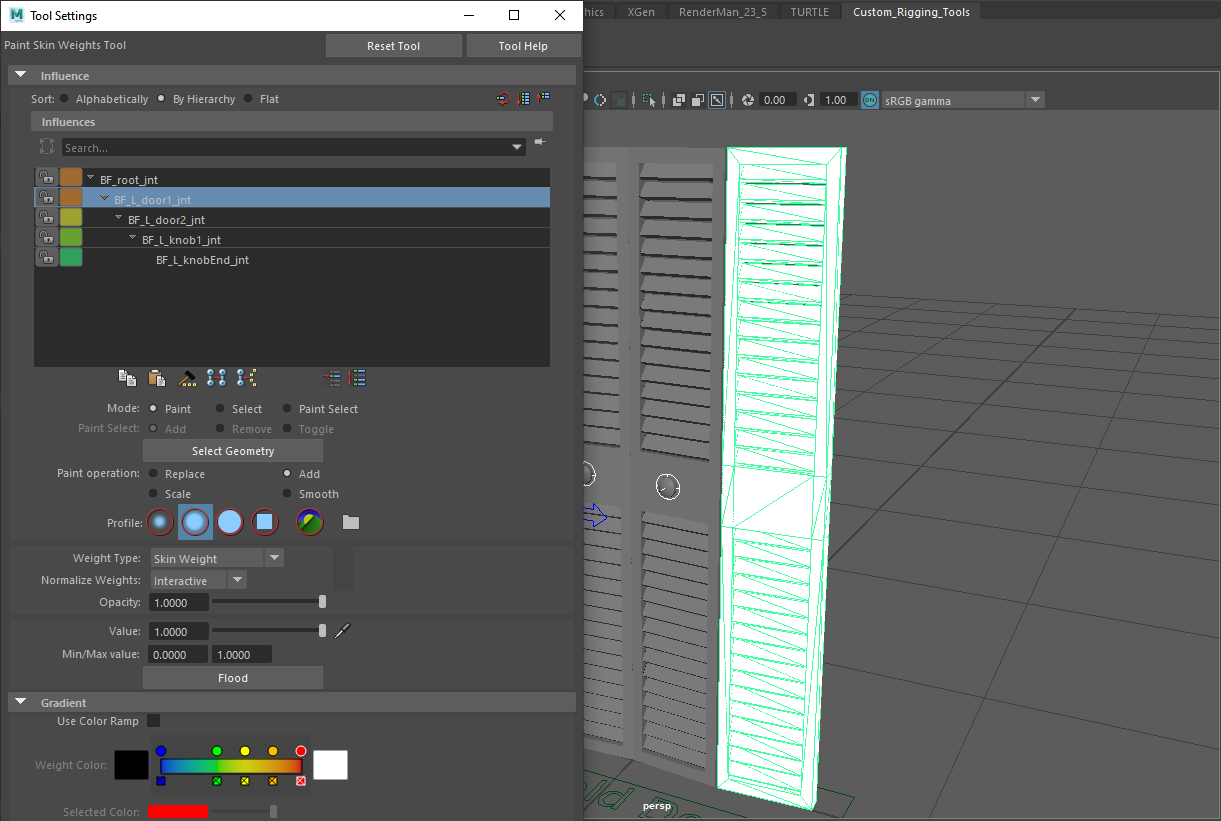
I then re-skinned the geometry back onto the rig which was flooding specific geometry to specific joints since this rig is very rigid.  

Flooding Skin Weights to Door

From here I updated this rig in engine and let my team know to check it in the VR head set for any unexpected issues.  

New Door in Engine


Wednesday, July 21, 2021

Real Time Hair with Unreal Engine 4 and Blender

 To further my hair knowledge in the real time world,  I learned Blender and used Unreal Engine 4.  Blender is a very new program for me and I chose use blender because I have seen a lot of people using blender for various projects and bringing it into unreal engine. 

My Friend Abi's Hair in Unreal Engine

Gif of Red Hair, Inspired by my Friend Wilson, in Unreal Engine

To start the process, I created a 3rd person project in unreal engine.  I went up to edit and under plugins I enabled both Alembic Groom Importer and Groom and restarted the editor.  When you open the project it took some time to compile shaders.  This is allowing me to import strands from an alembic file and render the simulation.  

Alembic Groom Importer and Groom in Plugins

while the shaders were compiling I opened up Blender and imported my UE4 man into the scene.  I deleted everything in the scene before I imported.  I went into edit mode and selected on the head where I want the hair to appear.  

UE4 Man in Blender

Selection of Geometry on UE4 Man's Head

With the selection, I created a group and named it hair, this makes it easy for me to grab that same geometry again.  In blender I created the hair using a particle system and then switching the type to hair.  I ran into an issue where the hair generated all over UE4 man.  I forgot to tell where I wanted the hair to generate so it went everywhere. 

Creating Geometry Group in Blender
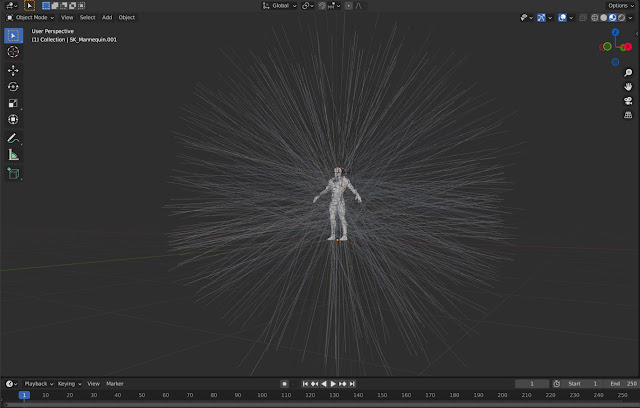
Hair Generated all over UE4 Man

To make the hair appear where I want it to, I went into the Density setting and set it to the hair group. I learned that UE4 man is a series of groups in blender so I could generate hair just on his hand or just on his foot. 

Hair Generated on UE4 Man's Head

After generating my hair, I began to get familiar with the tools in Blender to edit and create hair styles.  The first one I learned about was the Length setting.  This one controls how long your hair is and is usually the first setting you adjust to begin creating your hair style.

Gif of using the Length Setting

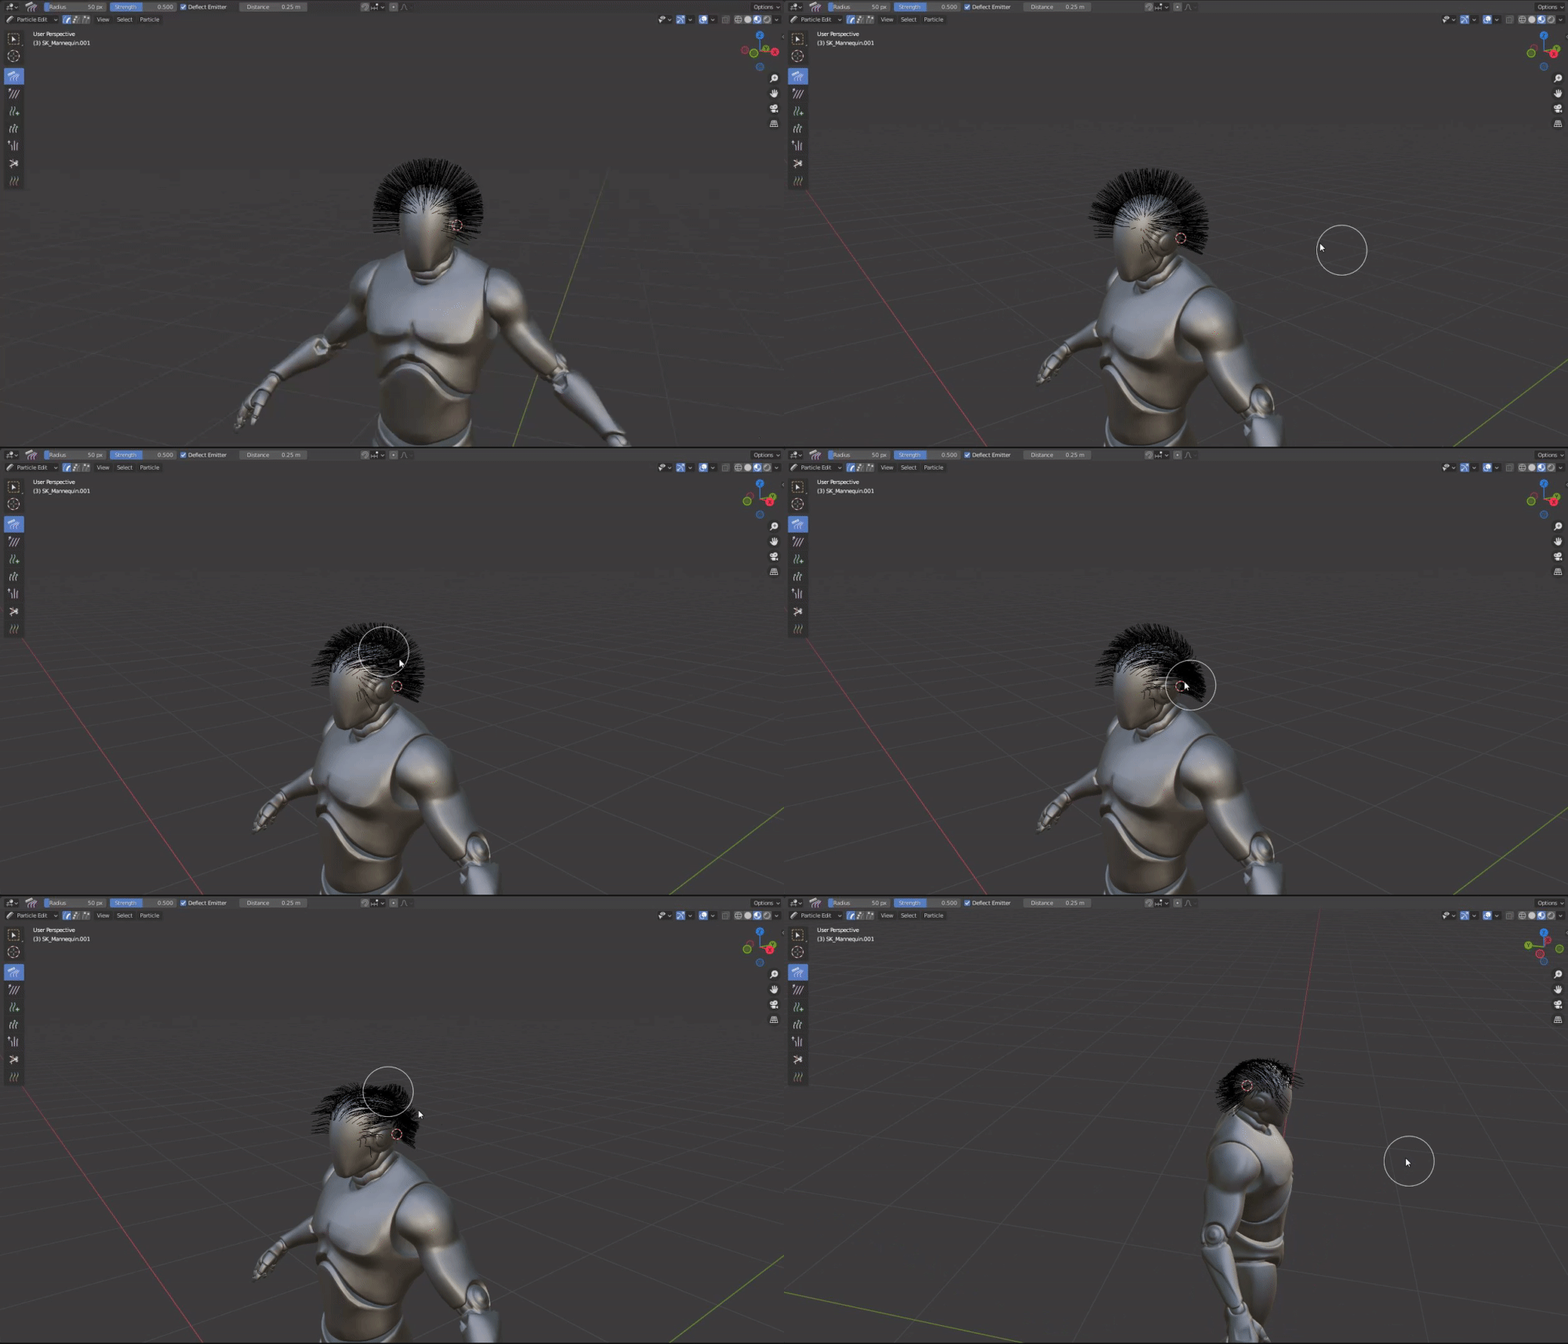
To begin styling your hair, you need to be in particle edit mode.  This brings up a series of tools that you can manipulate the hair with. 

Comb Tool - Quite literally brushes the hair 

Gif of the Comb Tool

Smooth Tool - Removes kinks for the hair

Gif of the Smooth Tool

Add Tool- Adds hair

Gif of Add Tool

Length Tool - Adds and Subtracts length to the hair


Gif of Length Tool

Puff Tool - Moves the strands away from each other


Gif Puff Tool


Cut Tool - Cuts the hair

Gif of Cut Tool

After getting familiar with the tools, I found some reference and got to work stylizing.  I went simple with my hair style, its harder than it looks to stylize the hair.  I tried to create the middle hair style in my reference.  From my experience with this first hair style, trying to even out hair in the shorter areas is what took most of my time.  

Hair Reference, I went with the Middle Hair Style

Hair Style in Blender

Once I got my hair style, I learned a little bit about interpolated strands. In blender you first need to be in object mode,  basically interpolated strands help with how the strands interact with one another.  It's a parent child relationship that physics is calculated from.  If you go intot he particle settings and select children you can make it interpolated.  When you mess with this setting it can get very tricky as you need to make sure the settings for display amount and render amount is the same.  Display amount is how much blender will show you and render amount is how much will export.  By default the render amount is 100 which is too big.  Blender looks at the render amount and will add 100 hairs for the hair you already see in the scene.  I put both of these settings at 20, keeping them the same will give you the result you are expecting.

Children Settings

To properly export the hair, I went under Particle settings, render, and I turned off show emmiter.  I unhid the skeleton in my scene and then selected both the mesh and then the skeleton and went up to file and export and selected alembic.  The recommended settings I found was to have the scale at 100, start frame at 1, end at 1 and have only selected objects and visible objects. 

Export Settings

To get the hair in unreal engine. I made a folder to keep the hair organized and imported it.   A specific groom icon appeared which meant the plugins were working.  I also found that in the groom settings before you import you need to make sure the rotationX is 90 degrees and the ScaleY is -1, unreal and blender disagree which way is up.  

Hair Icon

Groom Import Settings

Hair in Unreal Engine

To get the hair onto UE4 man, I selected his skeletal mesh and added a new components.  I then opened the third person character.  with the groom component selected, I went into the details and in the groom asset I selected the hair.  I found that the hair will appear but will float off the character.  This is a common problem so I learned about created binds.  I went back to the groom asset and right clicked on it.  I selected create binding and then a new window popped up.  I put in SK_Mannequin and pushed create.  

Floating Hair Problem

Hair Binding

In your binding asset in the character asset blueprint, plug in the hair.  Now the hair will attach to your character and follow them.  

Hair Attached to Character

Hair on UE4 Man in World

In Unreal Engine i found that the groom settings in general are nice.  Very easy to navigate and try new settings out.  The strands tab works with how your hair looks on a strand basis.  The most common settings you will use is hair width, hair root scale, and hair tip scale.   Another fun setting is the hair clip scale.  
UE4 Strands Settings

I noticed that the hair didn't really move on the top of the head so I  added some physics to the hair.  Physics helps make the move appropriately depanding on what the character was doing.  In the groom physics setting you can enble simulation.  This makes the hair jiggly.  You can also use air drag, bend damping, and bend stiffness.  

Gif of Jiggly Hair 

After getting jiggly hair I decided to change the color of the hair.  By default the hair comes in blond.  I created a new material and in the shading model I changed it to hair.  Under usage change it to used with hair strands, it won't work otherwise.  I created a simple hair shader with just color, scatter, specular, and roughness. 

Red Hair

To experiment with Physics further, I put the hair that is first generated in blender into unreal engine and messed with the physics.  I was really curious as to how it would look.  I've come to learn that sometimes physics can change the look of your hair all together.  It had a difficult time rendering the shadow so it would put a box over the character. 

Extremely Long Hair in UE4

To get some more practice, I created my friend Abi's hair.  her hair is partially saved on one side and is a bright blue color.  To start I brought the UE4 women into Blender and selected the geometry I wanted to generate hair on and instead of creating a group for it, I duplicated it.  I then generated my hair particle system on it. 

Hair that is Similar to Abi's

UE4 Women in Blender with Hair Particle System

In total to create Abi's hair it took me 7-8 hours.  This being my second time creating a hair style, I learned more about each of the tools and some of the other setting they have which helped a lot with solving problems such as evening out the shaved part and fixing bald spots.  Sometimes when fixing the hair blender would also apply it to the other side of the head so I had to constantly check and make sure I didn't make this mistake.  I also had to go between object and edit mode to see the hair.  In edit mode the hair turns black and to make sure the strands were going in the correct direction in was a constantly switching back and forth. 

Abi's Hair in Edit Mode

To create Abi's hair color I tried a different approach.  I learned how to use the texture paint tool in blender.  Its's similar to the node editor in Maya or blueprints in UE4.  I also checked the UV's so that it filled the entire UV space and unwrapped it.  Texture paint has many interactive tools that allow you to quite literally paint texture onto the hair.  I learned that when you are painting, you are paining on the root of the hair.

Shader Tab in Blender

Gif of Texture Paining Abi's Hair

Currently I'm coming up with a solution to bring Abi's hair color into Unreal engine.  I tried a different method where you create a separate geometry and line it up with the hair and then you unwrap the geometry and scale it's size.  After that you bake Abi's hair texture to the object and export it into unreal engine, But for now I have her in unreal engine with a simple shader to create her blue hair.  

Abi in Unreal Engine

Zenko Rig Reel

Zenko Rig Reel Zenko was my capstone character that I rigged and animated for Zenko: A Fox's Tale.  He is built to have a very reactive ...