
A Simple Crate Model
This week continued my progress on my crate game asset. After creating a crate in Maya, I exported it and imported it into ZBrush to start my process of adding on detail. When I started sculpting, I sculpted both the top and bottom part of the crate separately. After looking at multiple boxes I decided to go with an old box design that is soft on it's edges and uneven on some of the edges but with detail on the main wooden parts. For the brushes I used, I mostly used the DamStandard.

Old Crate Look

High Poly Resolution
After I decimated my crate, I exported my crate out of ZBrush and into Maya to create game resolution on my model.

Crate Model in Maya
In Maya I did explore quadrawing, I ultimately did not use quadrawing but I though the process of quadrawing was interesting.

Crate Lid with Quadraw
To create my game resolution crate I took my high resolution crate from ZBrush and made a poly cube the same size and placement and began to shape it into the high resolution model. To do this I used the extrusion tool, multi-cut tool, and I worked with a lot of the faces for clean up and for quick duplications. To make sure that the game resolution was the same as the high resolution crate I looked at them side by side. 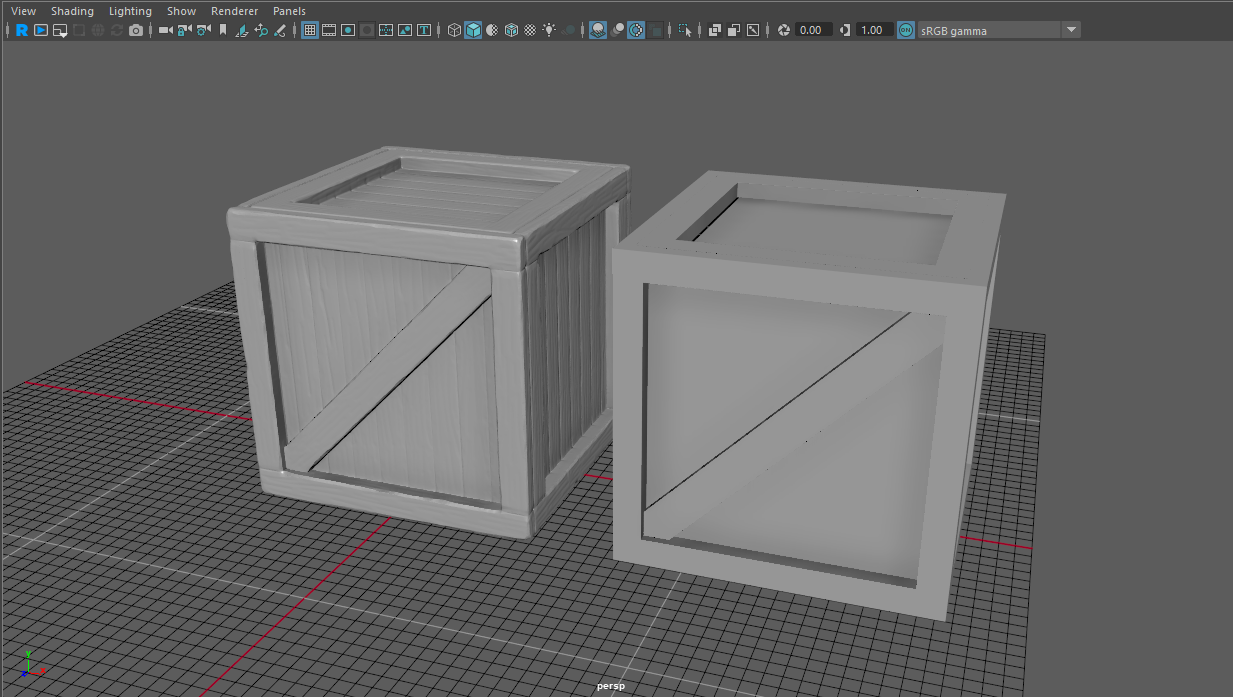
Creating Game Rez of my Crate

Crate UV's

Crate in Substance Painter
After I exported the game resolution into substance, I opened up my high resolution in ZBrush. I first named my two parts CrateTop_high and CrateBottom_low to match the naming convention on the low resolution crate. I also created a color ID on my model for future easy selection. To do this I simply shift selected the individual pieces and added a color to them. In the Decimation settings I turned on Use and keep Polypaint and then re-decimated and exported my pieces as FBX files.

Crate with Color ID

Crate Checking Baking Maps


No comments:
Post a Comment